17 DIY Baby Shower Decorations on a Budget
The dollar-store tulle sits in a plastic bag on your kitchen counter, mocking you. Twelve days until the shower. Your Pinterest board has forty-seven pins, your budget has ninety dollars, and your sister-in-law casually mentioned that the last baby shower she attended had a live harpist. Breathe.
You don’t need a harpist, and you definitely don’t need to spend $400 on pre-made balloon arches or those overpriced diaper cakes wrapped in cellophane at the party store. What you need is a plan, some hot glue, and a handful of clever swaps that stretch cheap materials into something that actually looks intentional.
Ahead, seventeen decorations you can make yourself, from paper flower backdrops and mason jar centerpieces to a diaper cake that costs less than a takeout dinner. Every project uses supplies from the dollar store, the craft aisle, or things already hiding in your recycling bin.
Canvas Banner as Photo Backdrop
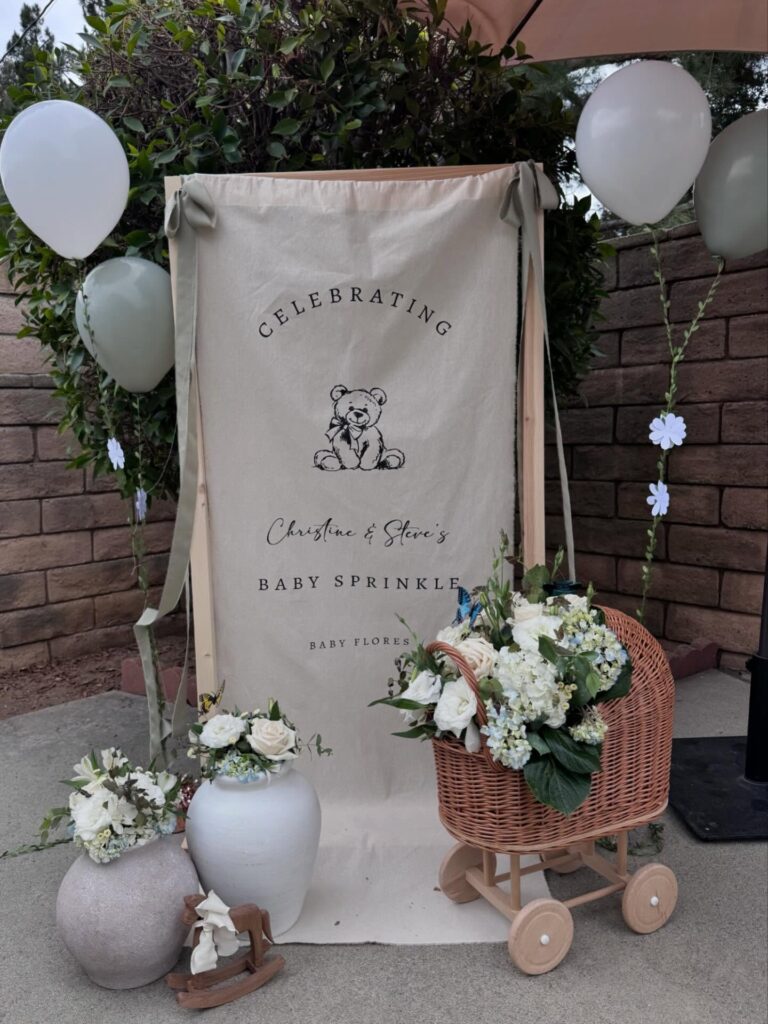
Fabric banners like this one get stretched between two wooden dowels and tied off with ribbon — that’s really the whole construction. You can order a custom canvas print from Etsy for around $30–$45, which is less than most foam board setups and holds up outside without curling. The trick is what you put in front of it.
A wicker doll pram from a thrift store or Facebook Marketplace filled with white roses and hydrangeas does most of the heavy lifting visually. Two ceramic vases at different heights, a small wooden rocking horse tucked in low — none of it expensive individually. Sage and white balloons on either side frame it without needing a proper balloon arch.
Worth noting: skip the paper flower garland on the side wall unless someone’s actually going to maintain it during the party. Wind is not its friend.
Blue Arch Backdrop
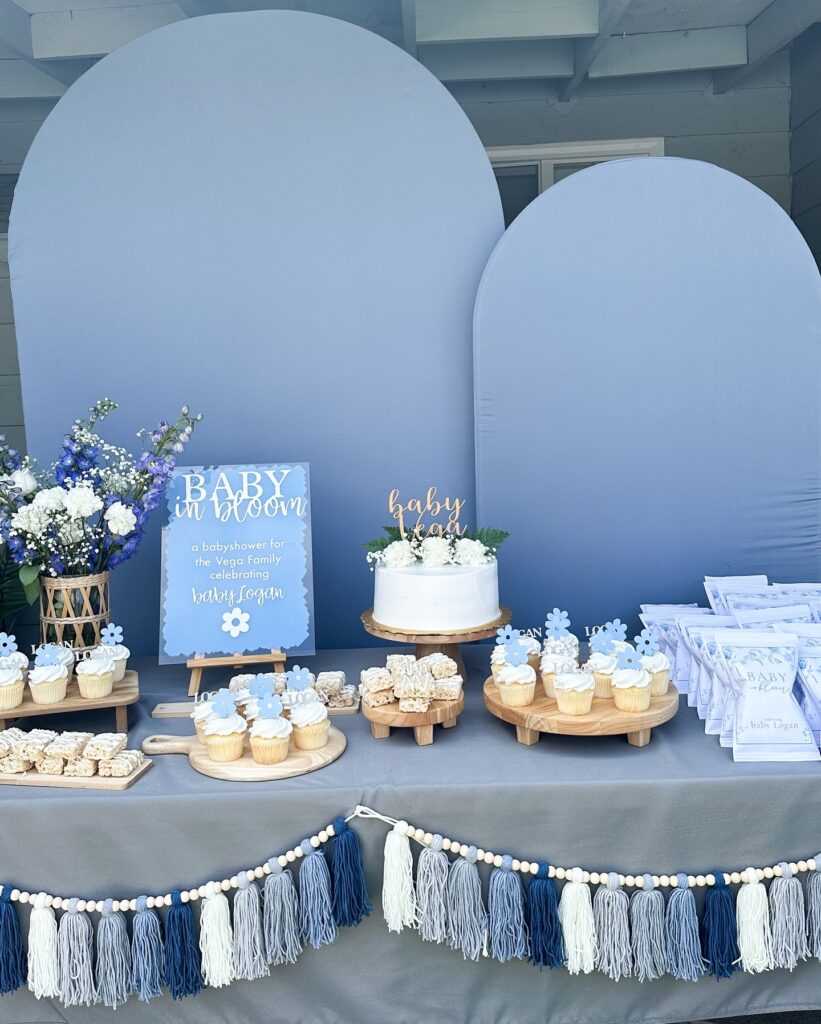
Instead of hiring a backdrop, cut two arch shapes from foam board or cardboard and paint them in two shades of blue, keeping one taller so the table has some height behind it. Prop them against a wall, or tape them to a simple frame if the party is outside. Keep it matte.
The tassel garland across the table front does a lot for very little money, especially if you mix yarn, string beads, and a few darker blue pieces. Wooden cake stands help break up all the blue without needing extra decor. I’d skip printed treat toppers if your budget is tight; one small sign and a cake topper already carry the theme.
Book Page Backdrop Wall
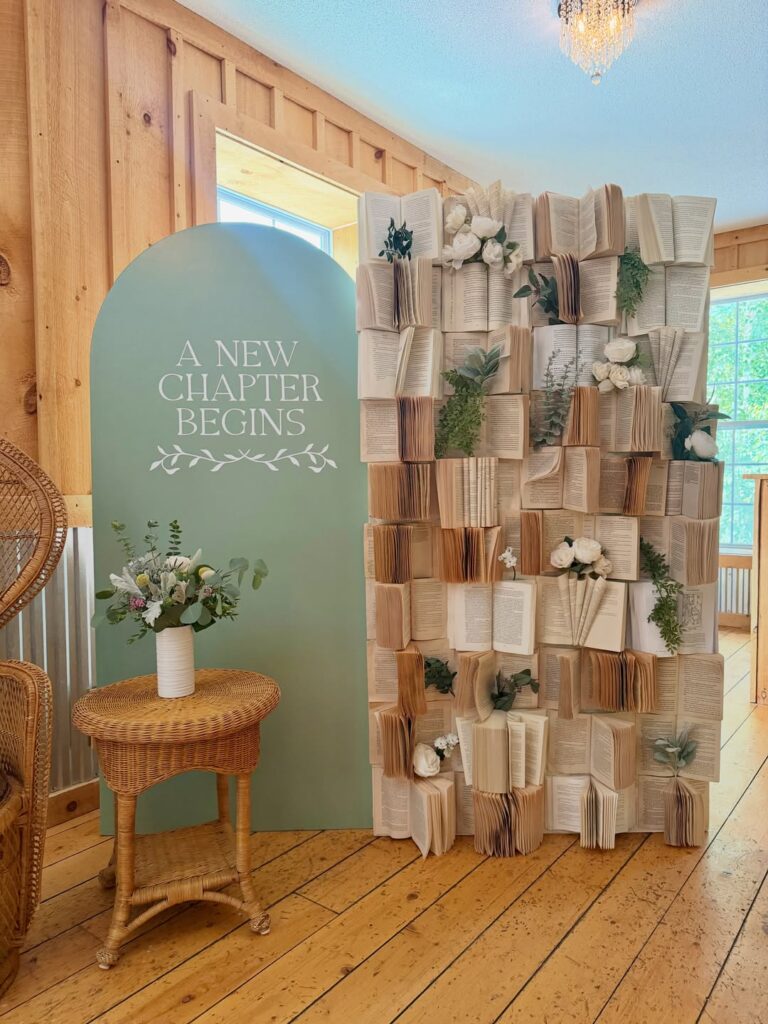
This one takes patience. You’re building a wall of open books, spine-out, stacked and staggered so the pages fan forward at different depths. Thrift store hardcovers are the move here — the older and more yellowed, the better the texture reads. Wire or hot glue them to a plywood backing, then tuck faux white roses and eucalyptus stems into the open pages at random intervals.
The “A New Chapter Begins” arch next to it does the heavy lifting on theme, so the book wall can stay quiet. If you’re short on time, skip the arch and just lean a smaller book panel behind the gift table. Works for a book-themed shower, obviously, but also a storybook or literary nursery reveal. One warning: the books get heavy fast, so build in sections you can actually carry.
Baby Clothes Centerpiece
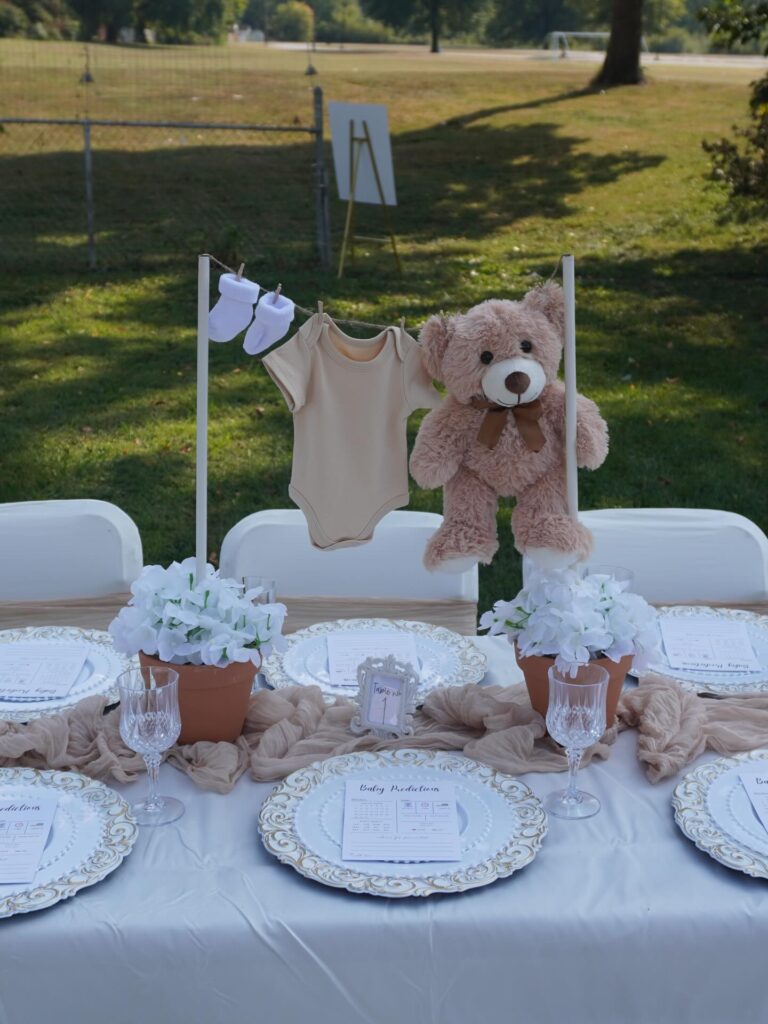
Start with a thin clothesline frame in the middle of the table. Two white poles, a short string, then clip on one neutral onesie and a pair of baby socks so the setup reads clearly from across the yard without costing much at all. Add a teddy bear on one side to fill the height and keep the display from looking too spare. That part matters.
At the base, use small terracotta pots with white faux flowers instead of one large arrangement. They are cheaper, easier to carry, and you can reuse the pots later.
This works best for outdoor showers where wind can flatten paper decor fast, but soft fabric and a plush toy usually hold up better. I’d skip anything too tiny on the line though, because little mittens or pacifiers tend to disappear in photos.
Flower Bar Setup for Outdoors
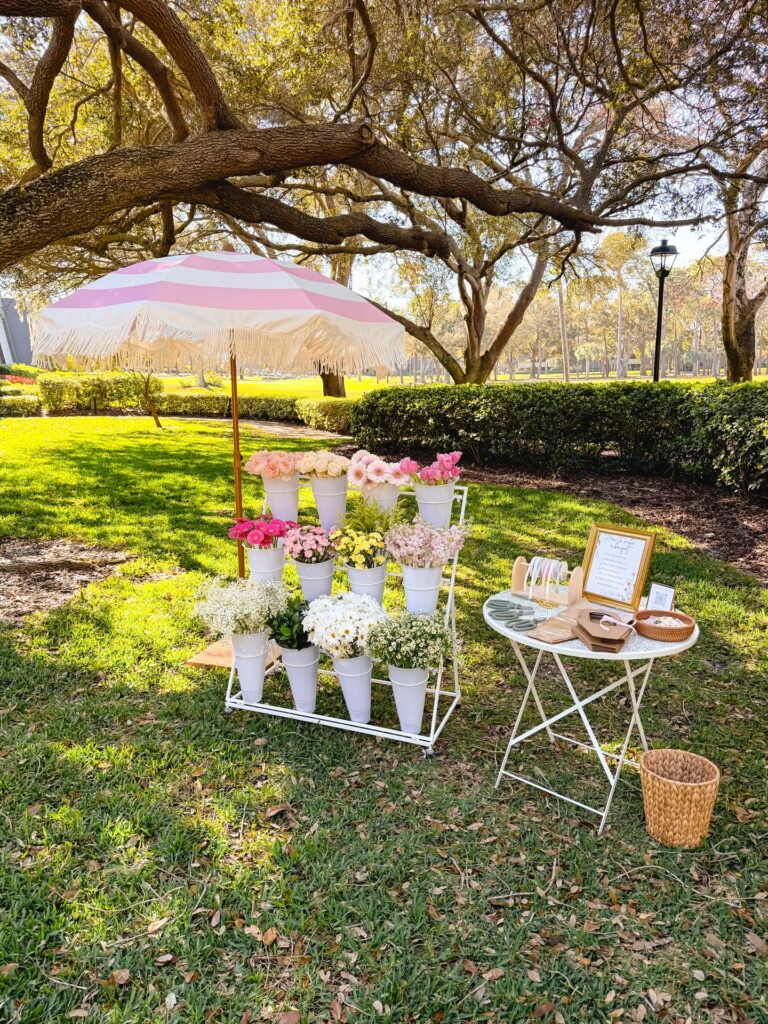
White metal buckets on a tiered rack, each one holding a different bloom — baby’s breath, pink gerberas, yellow mums — so guests can pick their own stems and wrap them to take home. The small bistro table next to it holds the wrapping supplies and a framed sign explaining what to do. That part matters more than people think, because without it, guests just stand there unsure.
Rent or borrow the tiered rack if you can; buying one for a single event isn’t really worth it. The fringed umbrella in the photo is a nice touch for shade, but a plain one does the same job. Stick to three or four flower types to keep costs down. Works best for an outdoor morning shower.
Paper Banner Backdrop
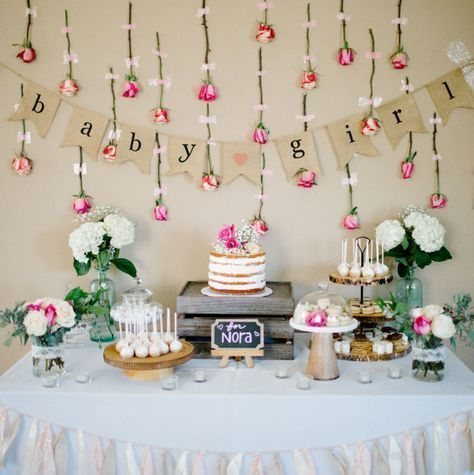
A kraft-paper baby girl banner can do most of the work here if you hang it low enough to sit behind the cake table, not up near the ceiling. Use twine. Cut triangles from brown paper bags or cardstock, write one letter on each, and clip them with tiny clothespins if you do not want to punch holes.
Space the rose strings unevenly, since perfect rows can start looking like a shop display. I’d use artificial flowers here, because real roses hanging all afternoon will droop before anyone has finished the cake. The small pink bows are optional.
If budget is tight, use tissue flowers instead.
Neutral Backdrop With Banner
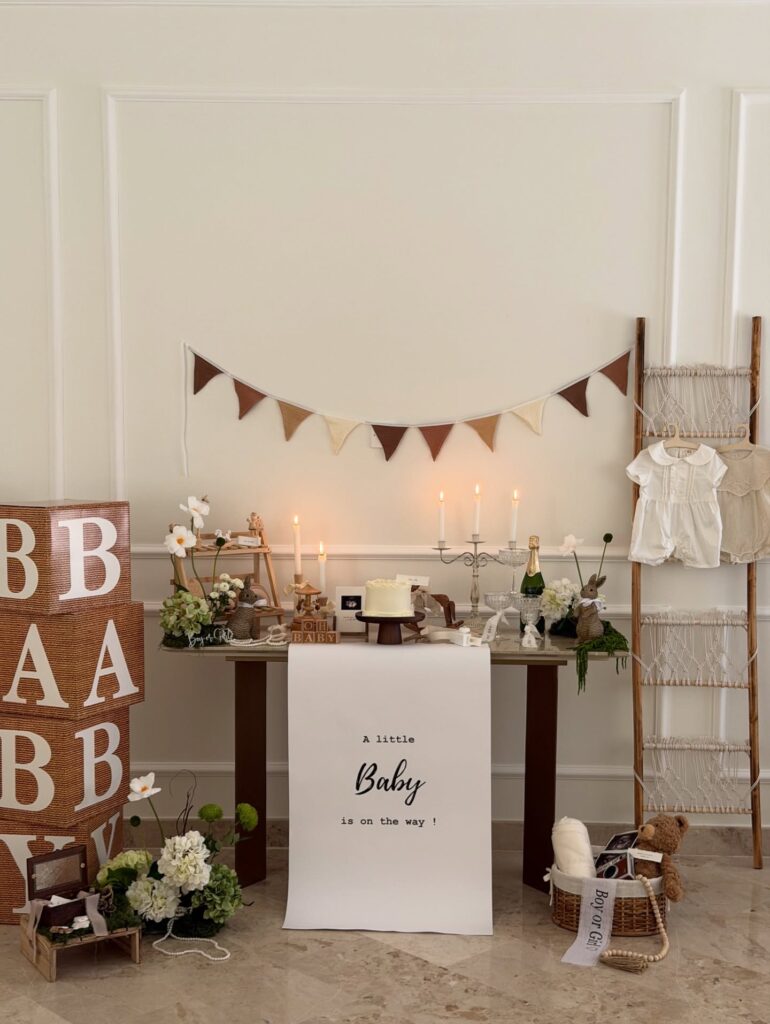
The triangle bunting in cream, tan and brown is the easiest part of this whole setup to recreate. Cut felt triangles, glue or stitch them onto twine, done. You probably have the felt scraps already.
What makes it work is the paper banner underneath the table, hanging like a tablecloth that goes all the way to the floor. Just a roll of white kraft paper, some handwritten text in a script you print off and trace. Costs almost nothing.
I’d skip the calligraphy attempt if your handwriting isn’t there. Print the whole thing on a large-format sheet at a copy shop for about the price of a coffee. Tape it to the underside of the table so the paper drops cleanly. The pennants above give you the color, the paper gives you the message.
Seed Packet Display
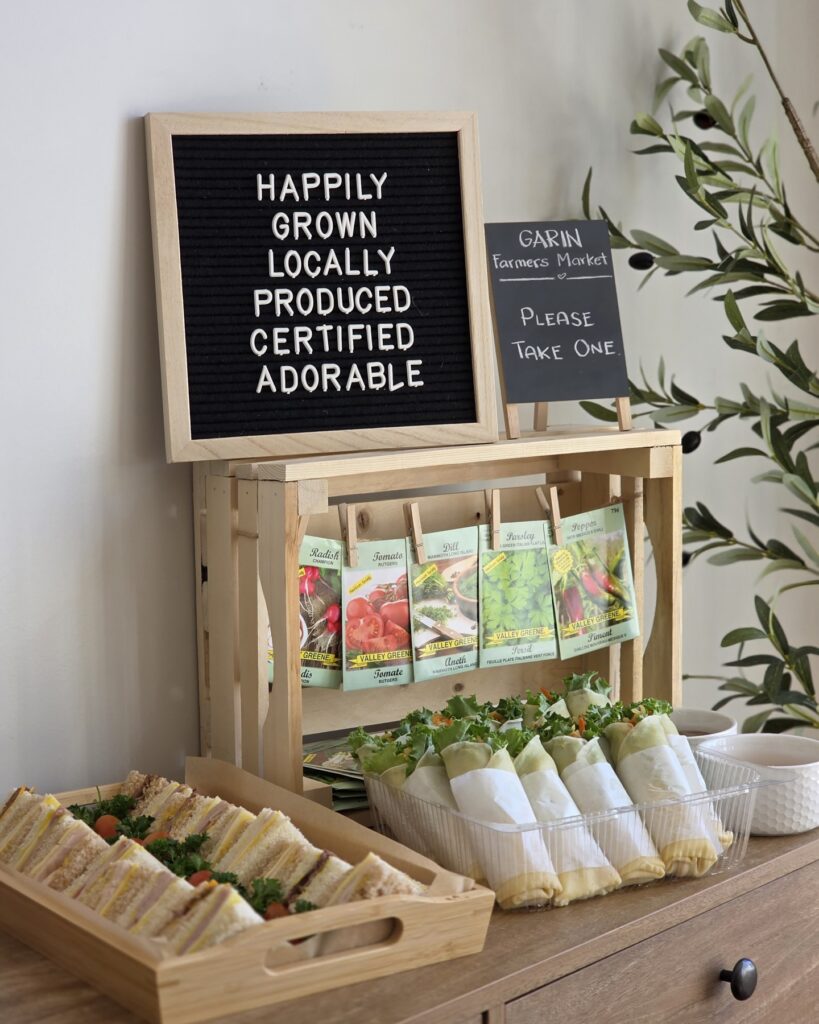
Start with a small wooden crate or even a thrifted shelf and clip seed packets across the front with mini clothespins. Cheap, useful, and they double as favors people will actually take home instead of leaving on the table with the paper plates.
The letter board works because it gives the whole setup a market-stand feel without much effort, and you can keep the wording plain or make it fit the baby shower theme. Add a little sign that says “please take one” so guests don’t stand there wondering if the packets are decor only.
If you want food nearby, keep it neat. Wrapped veggie bundles or tea sandwiches fit the garden angle better than a big bowl of snacks. I’d skip anything too drippy here since seed packets and dips are not a great mix.
Drink Station from an Old Dresser
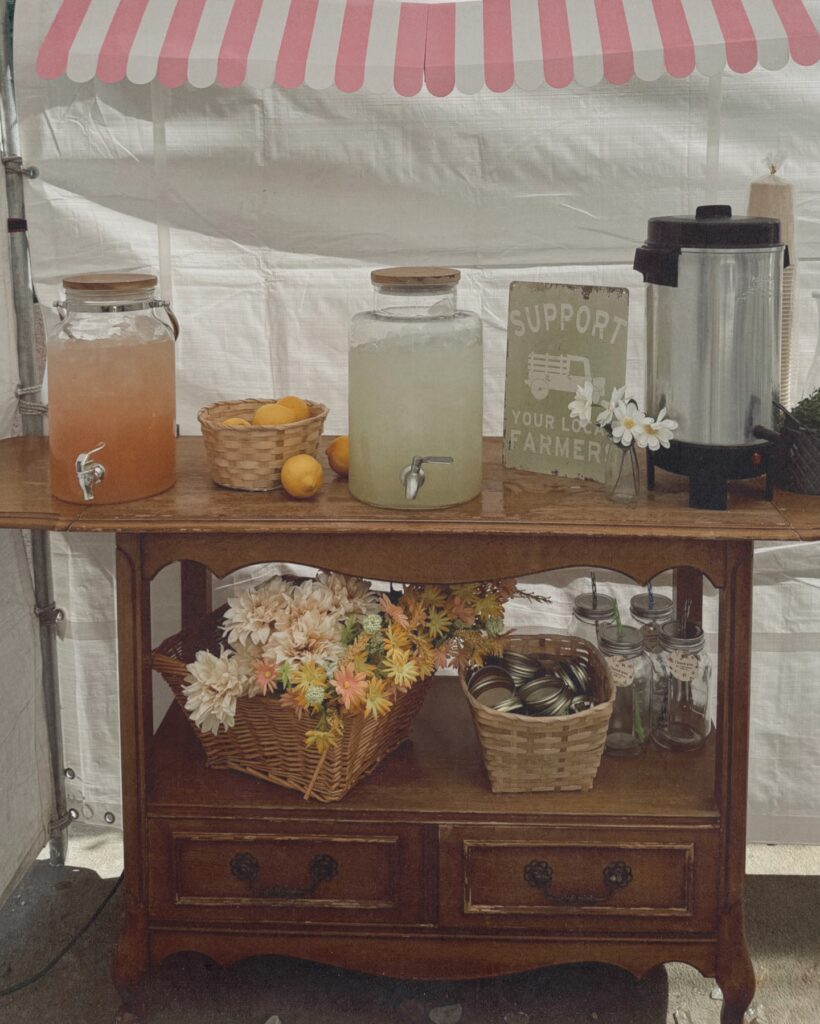
A small side table or dresser with a lower shelf does most of the work here. The two glass drink dispensers with wooden lids — one pink lemonade, one regular — are the kind you find at HomeGoods or Amazon for around $15 each, and they read well from a distance. Mason jars in a basket on the lower shelf handle the cups without needing a separate table.
The “Support Your Local Farmer” sign is just a piece of the market-stall feel; for a baby shower, swap it for a small chalkboard with the baby’s name. Loose faux flowers stuffed into a flat wicker basket underneath cost almost nothing. The striped awning overhead is doing a lot — if you’re under a canopy tent already, clip a few feet of striped fabric to the frame above.
Painted Paper Backdrop
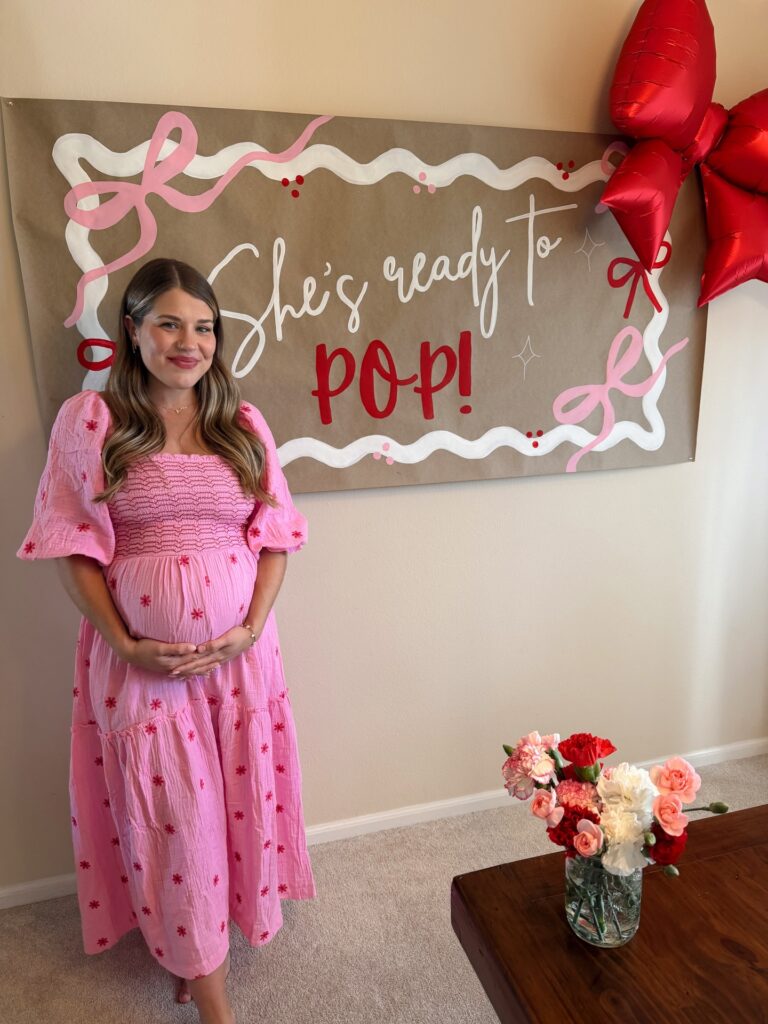
Tape a long sheet of kraft paper to the wall and paint your message straight on it, like the “She’s ready to pop!” sign here. Keep it big. A white wavy border fills the empty space without needing many supplies, and the pink ribbon shapes make it look planned even if your lettering is not perfect.
You can use poster paint, a thick brush, and one smaller brush for dots or little star marks around the words. If painting words makes you nervous, sketch them lightly in pencil first or print the phrase and trace it near a window. I would skip glitter here because it sheds everywhere and makes cleanup annoying, especially on carpet.
Add a few balloons on one corner only, so the paper still does most of the work.
Hot Air Balloon Gift Basket
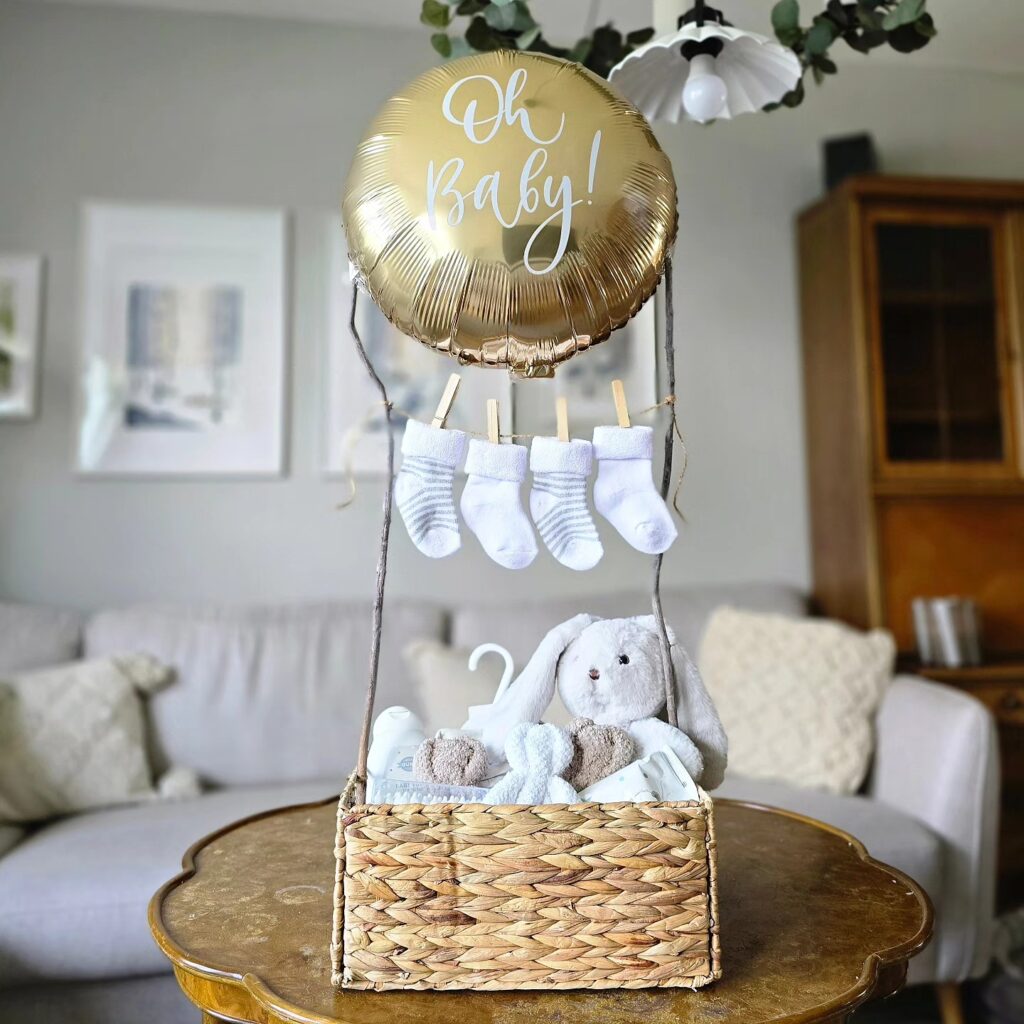
This one looks harder to build than it actually is. A square woven basket, two bent twigs crossed over the top, and a foil balloon tied where they meet. That’s the whole frame. The little sock bunting strung between the twigs is what sells it, and you can peg on booties, mittens, tiny hats, whatever the parents will actually use.
Fill the basket with the real gift underneath — muslins, a plush bunny, sleepsuits rolled up so they hold their shape.
One thing I’d change: skip the foil balloon and use a round paper lantern instead. Foil deflates within a day and looks sad by the end of the shower. A lantern holds up, and you can hand it over as part of the nursery.
Photo Guessing Board
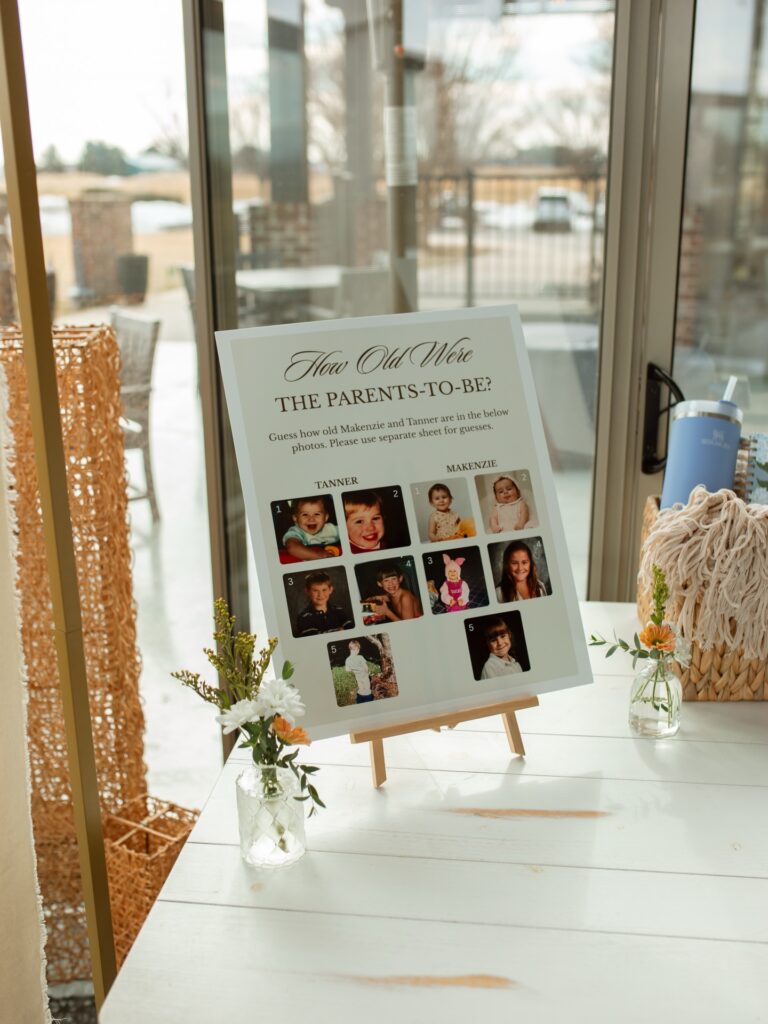
Set a foam board or cheap poster in a simple frame, then print baby and childhood photos of the parents-to-be in small squares so guests can actually guess instead of just smiling and moving on. Add a title at the top, keep the layout split into two columns like this, and place it on a mini easel so it reads like decor without taking over the gift table.
The little bud vases help. Two or three tiny jars with a few grocery-store stems are enough to make the board look finished, and they cost a lot less than a full flower arrangement.
This one suits mixed-age groups.
I’d skip glossy prints if you can, because window light throws glare across the board and people end up leaning in at odd angles trying to read the names.
Gold Bar Cart Favor Station
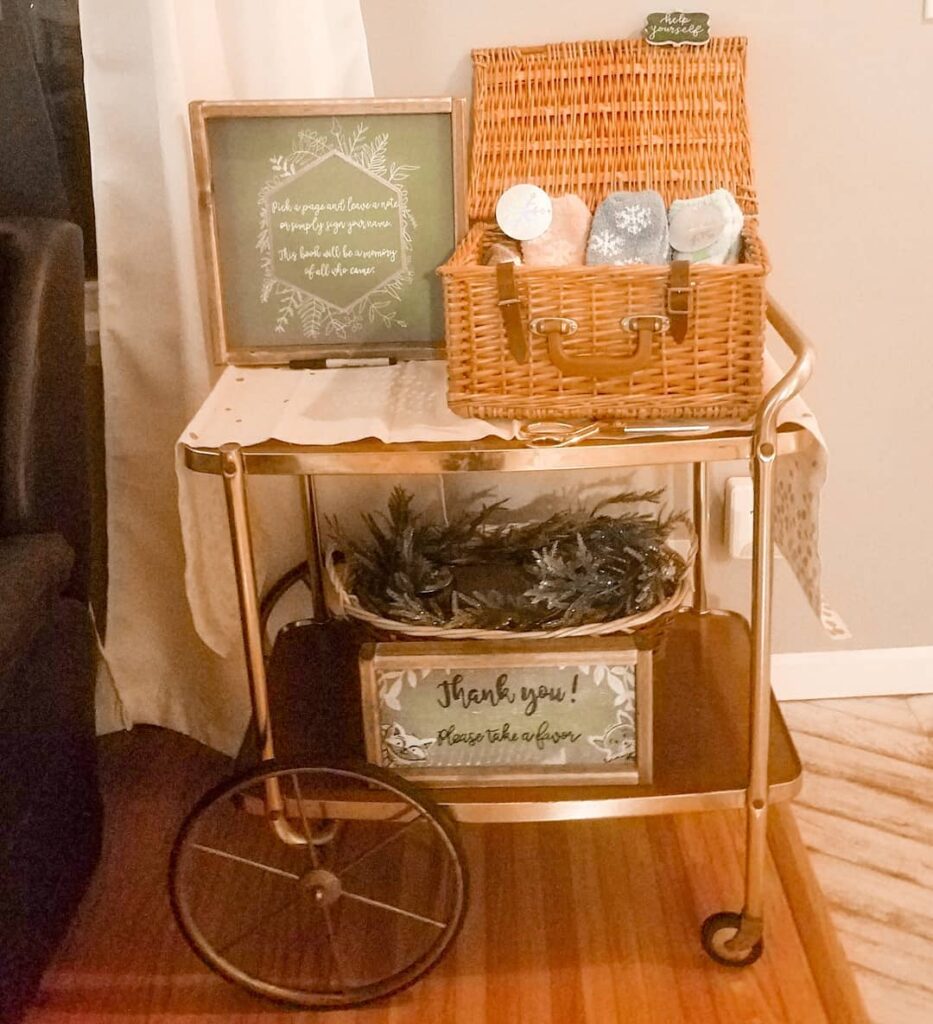
Thrift stores still have these rolling bar carts fairly often, and a coat of gold spray paint handles the rest. The wicker picnic basket on top doubles as the card box — that “help yourself” tag clipped to the lid tells guests exactly what to do without anyone having to explain it. Below that, a flat basket filled with greenery just sits there as filler, which honestly costs almost nothing if you clip it from outside.
The favor sign on the bottom shelf (“Thank you, please take a favor”) keeps the whole thing self-running so you’re not standing next to it all afternoon. Worth doing if you already own a cart or can find one cheap. If not, a tiered plant stand pulls off the same layout for less hunting around.
Memory Net Station
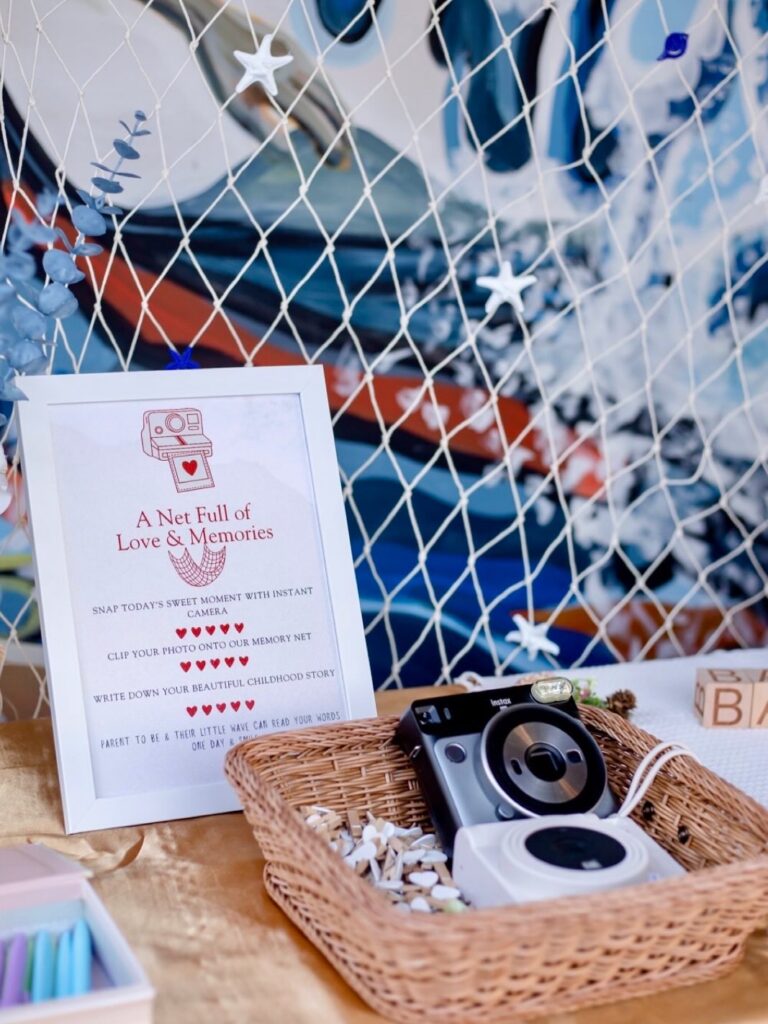
Hang a white net behind the table and add small clips so guests have somewhere clear to pin their instant photos. Keep it low. Set a framed instruction card beside the camera, because people will use the setup faster when they do not have to ask what it is for.
A shallow basket works well for holding the camera, film packs, pens, and extra clips without making the table look crowded. Little star shapes or paper shells can be tied onto the net if you are doing an ocean theme. I’d skip real starfish though, paper ones are cheaper and easier to tape.
A small thing, but people remember it.
Onesie Decorating Station
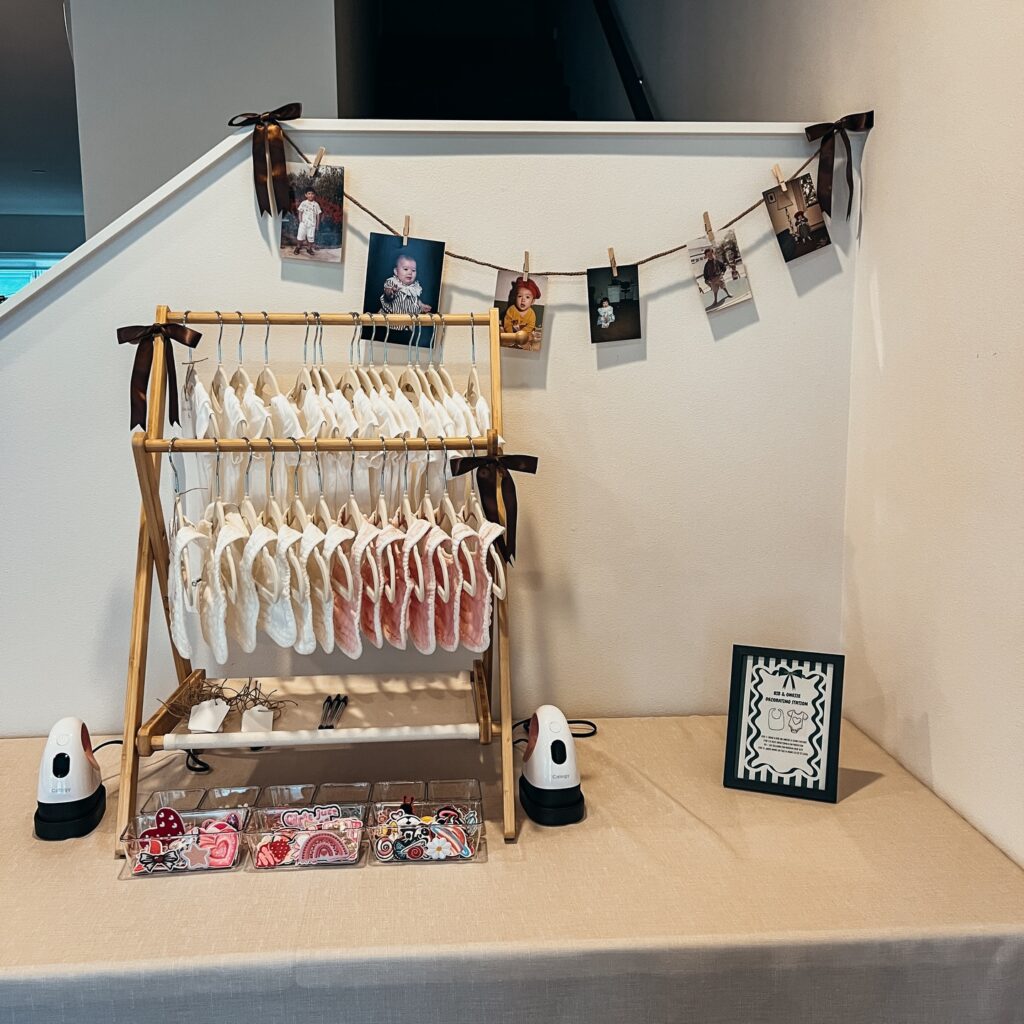
This one earns its keep because guests actually do something. A little bamboo rack, plain white and pink onesies on hangers, iron-on patches sorted in a clear divided tray, and two mini heat presses on either side. Done. The photo garland above — baby pictures of the parents clipped to twine with brown ribbon bows — ties it back to the shower without extra signage.
If you’re pulling this together, buy blank onesies in a couple of sizes so the baby doesn’t outgrow every single one by month three. That’s the mistake I’d avoid. Skip fabric paint unless you want a two-hour drying situation. Patches and a mini press are faster and guests leave feeling like they made something. Add a small framed instruction card so you’re not explaining it forty times.
Typewriter welcome table
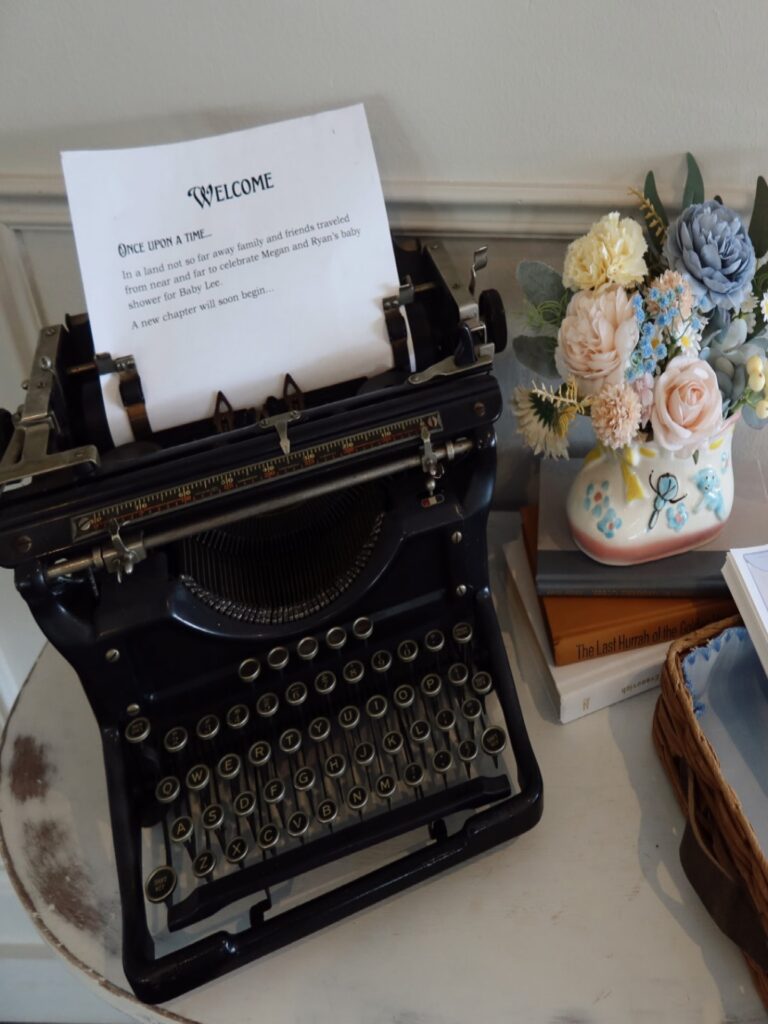
Start with one statement piece. An old typewriter works well here because it already has weight, height, and a bit of story, so you do not need to keep piling on extra decor around it.
Feed in a single sheet with a short welcome note, a little poem, or the parents’ names and shower date. Keep the paper plain. That part matters.
Next to it, set one small vase or pitcher of faux flowers on top of two or three stacked books, which lifts the arrangement without making the table look crowded, and it also helps if your typewriter is dark and visually heavy.
This suits a storybook or vintage baby shower best. If you do not have a typewriter, use an old keyboard, a framed printed page, or even a thrifted library card catalog drawer. I’d skip anything too polished here. The charm is in the worn pieces.
Onesie Decorating Station With Balloon Arch
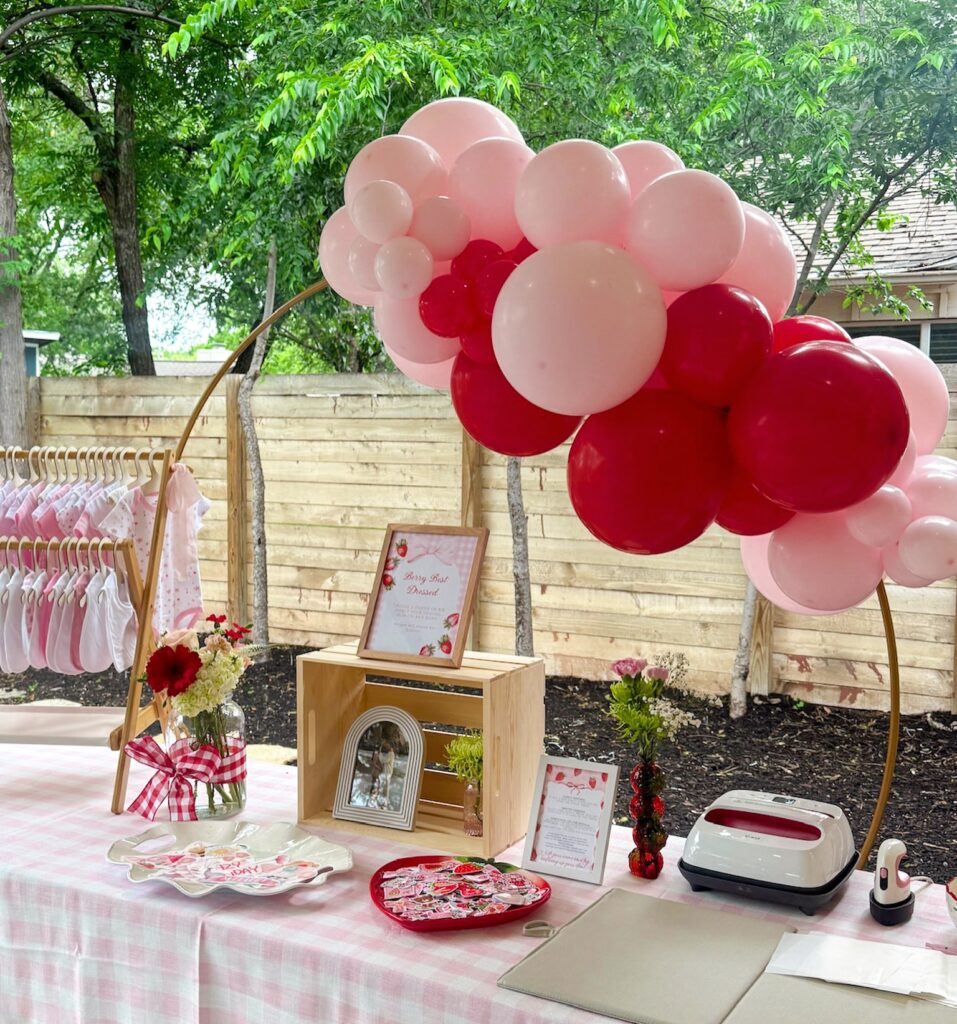
The wooden clothes rack on the left holding pink onesies is doing a lot of work here — it signals to guests immediately that this is an activity, not just a display. A Cricut heat press sits on the table, which is the one piece of equipment worth borrowing or renting if you don’t own one, because iron-on vinyl on baby clothes is genuinely easier than it looks. The gingham tablecloth underneath everything is just fabric from a craft store, cut to length.
For the balloon arch, a gold hoop stand from Amazon and a bag of mixed-size balloons in two colors gets you most of the way there. Skip the frame and crate styling if you’re short on time — the rack, the balloons, and the activity itself carry the whole station.
