
21 Christmas Dessert Table Ideas Guests Will Photograph First
A Christmas dessert table is hard to get right because the sweets come in different shapes, sizes and colors, and they can end up looking like a pile of plates. Guests notice that right away, long before anyone picks up a fork. This list gives you 21 ways to set up a dessert table so it looks good the moment someone walks in with a phone. Each idea has its own photo, so you can see the layout before you try it. Some are small and quick to set up. Others take more planning and more space. Start anywhere. Pick the one that fits your room, your guest list and the time you have. Then set it out, step back, and check how it looks from the doorway. That is where most people will see it first.
Layered Dessert Cups
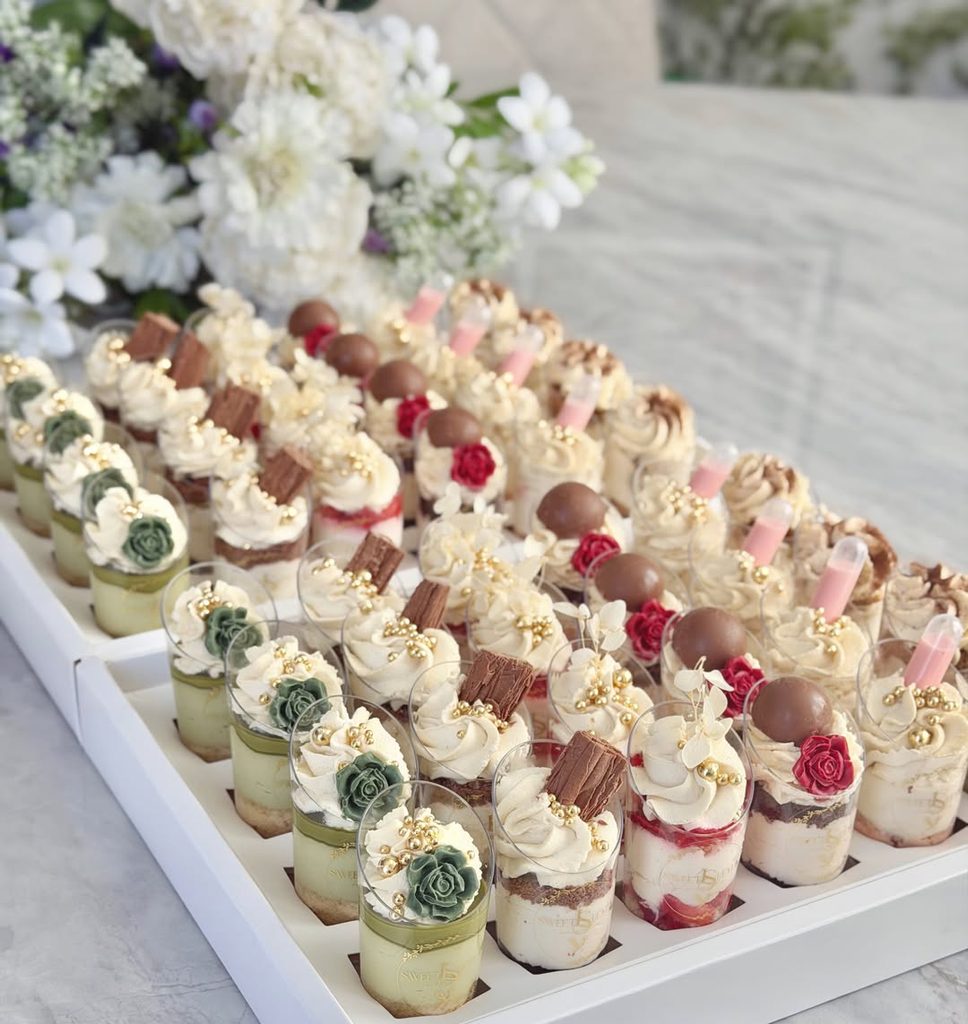
Individual layered dessert cups make a useful end point for a Christmas buffet. Set the tray at the far end of the dining table, after the savory dishes, so guests can pick one up without reaching across serving bowls. The clear cups show the cake and cream in layers, while the piped tops, red accents, and small gold details give each portion its own finish.
They also work on a sideboard near the coffee service when the meal is over. Leave space around the tray for plates and spoons, and arrange extra portions behind it so the display stays easy to reach as guests come back.
Christmas Tree Cupcake Stack
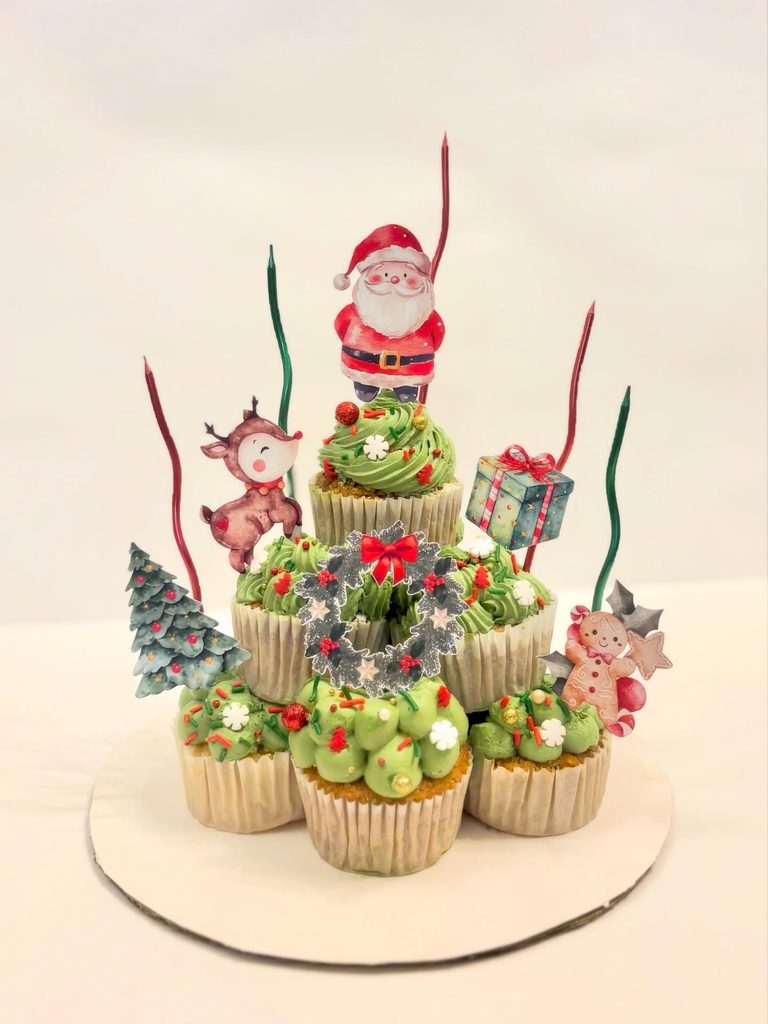
Stack green-frosted cupcakes into a Christmas tree if you’d rather hand out individual portions than slice a cake. Pick this if you enjoy piping but don’t want to shape a cake or cover it in fondant. Paper toppers add characters without making you model them from icing.
For a party where children will help themselves, choose a lower cupcake arrangement from the list so they aren’t pulling from beneath the stack. This version is better for a table where someone can serve from the top down.
Christmas Tree Waffles and Cupcakes
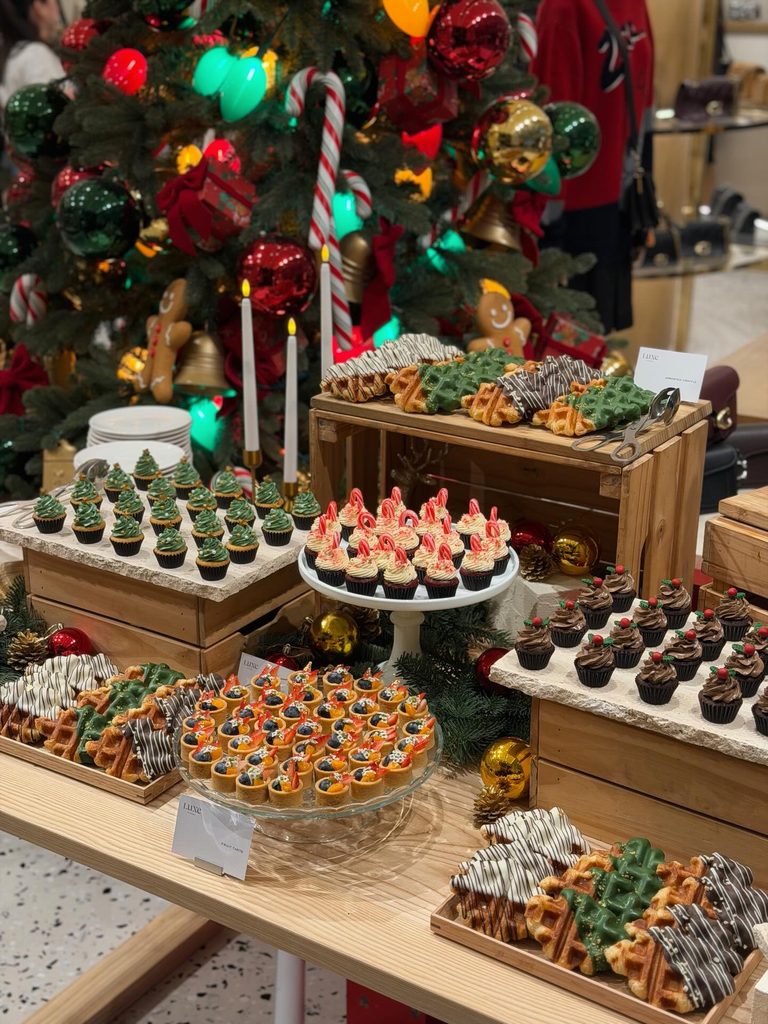
Waffles cut into tree shapes, half dipped in green and striped with dark chocolate, work well when you set up the table in layers. Build the raised levels first, using wooden crates with flat stone slabs on top. Then fill them with cupcakes in small groups of one kind each. Place the dessert trays last, and keep the cupcake toppings low so the lit candles and the real tree behind them stay visible.
Candy Shop Counter
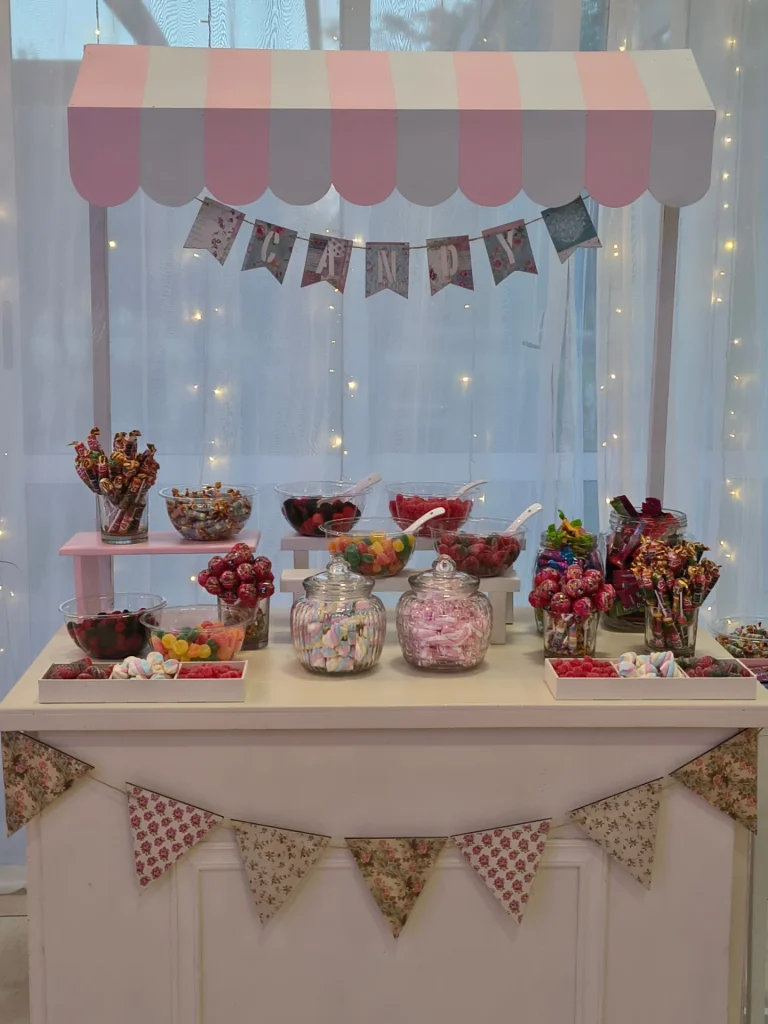
A candy-shop counter has a striped canopy above bowls and glass jars of sweets. Fill them with wrapped lollipops, gummies, marshmallows, and red candies, then add paper bunting along the front. Without a canopy, cut a scalloped top from cardboard and cover it with striped paper.
Clear bowls can hold the same mix if you do not have jars.
Pink Gingerbread Cupcakes
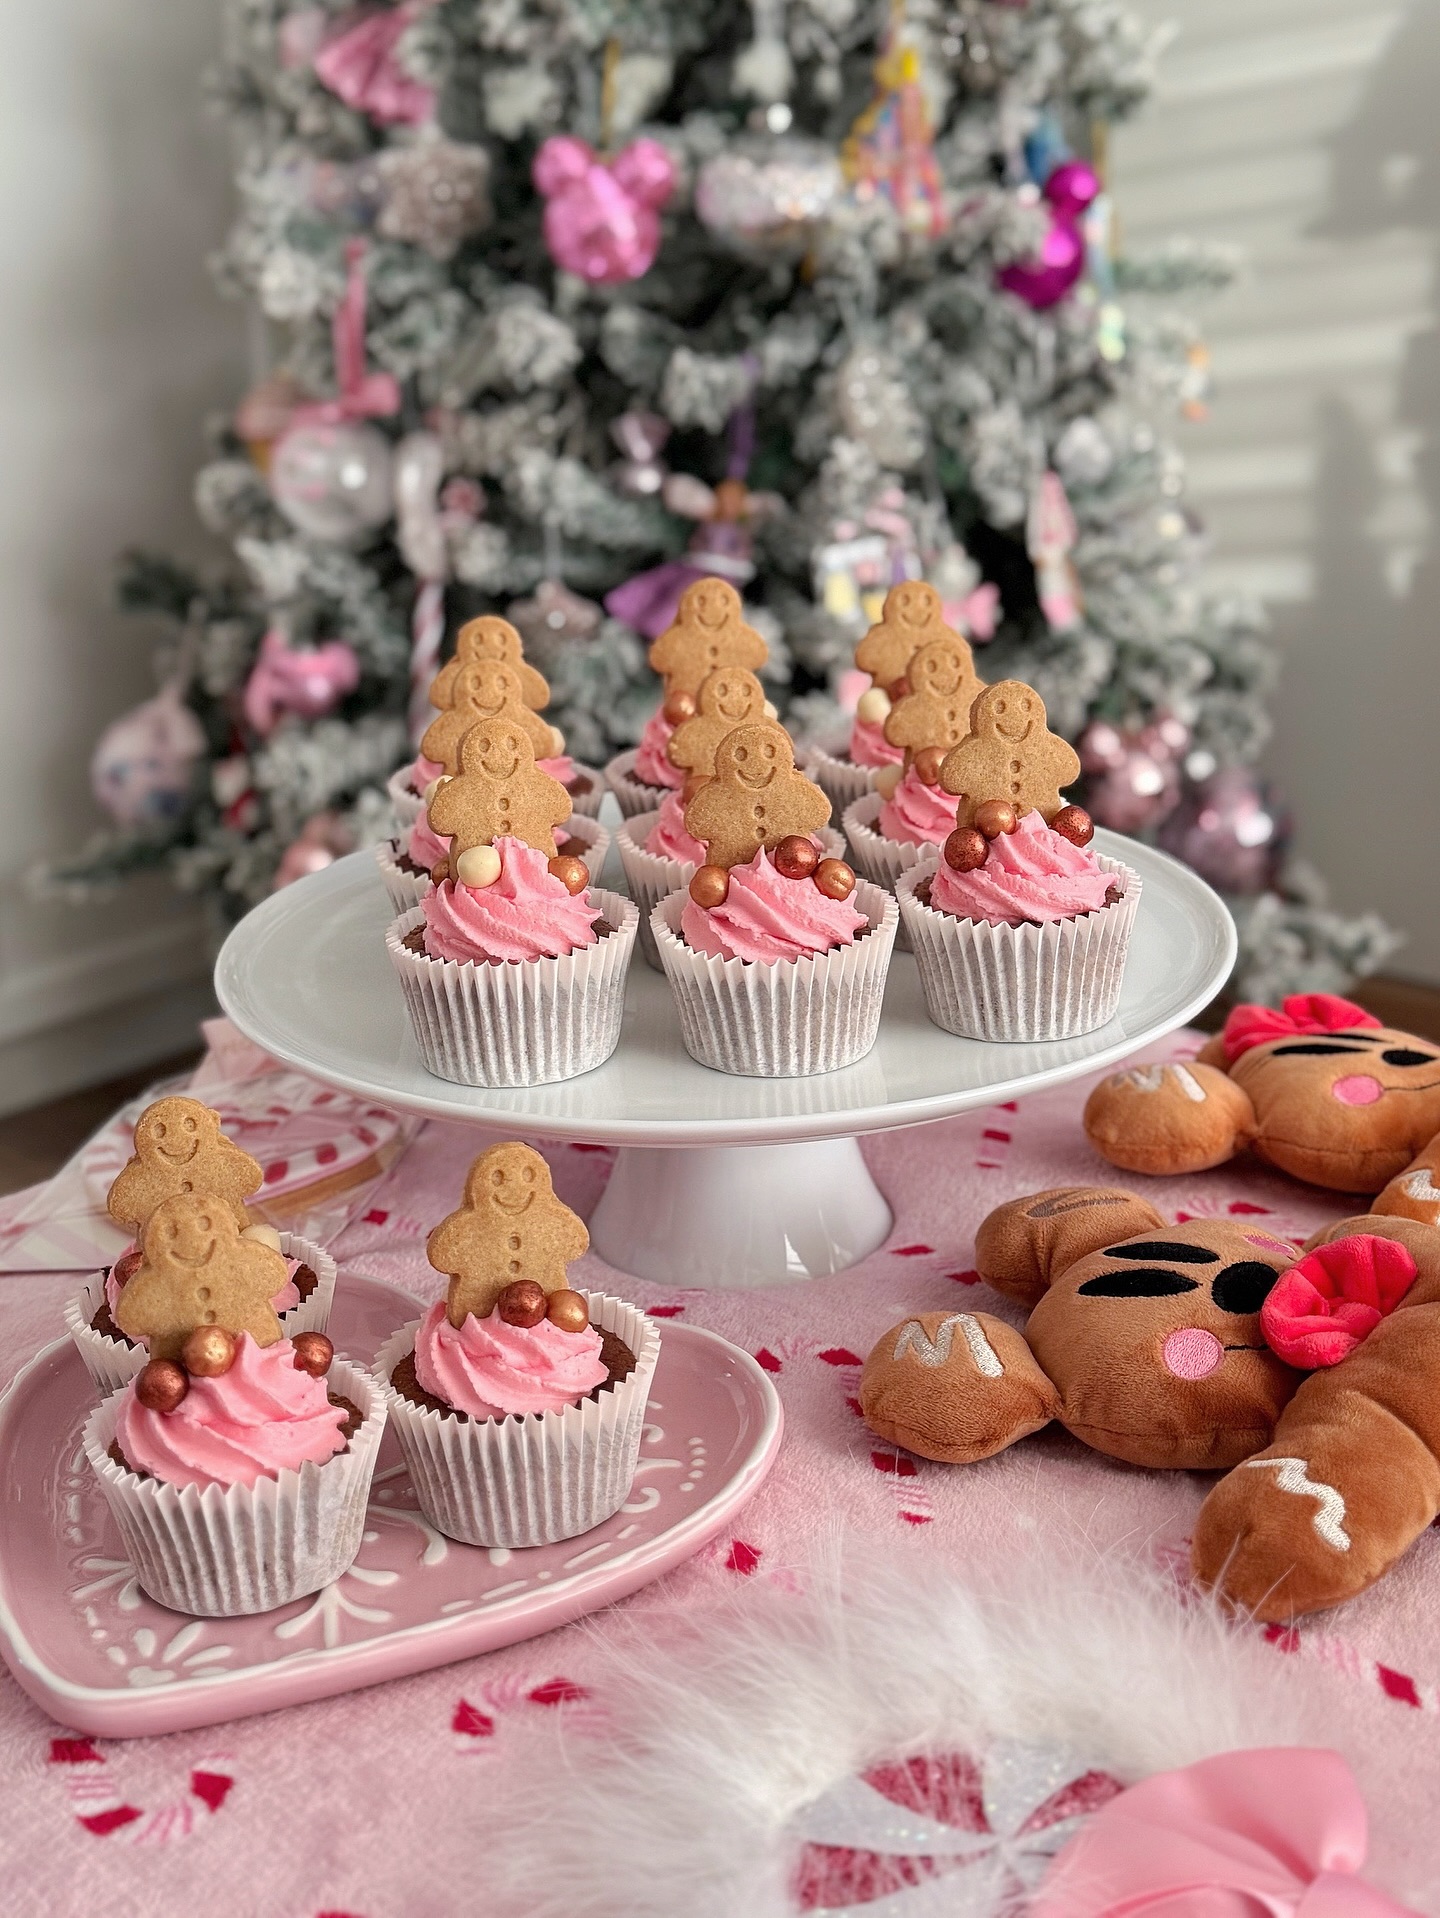
Press gingerbread biscuits upright into pink frosting so their faces sit above the swirl, rather than laying them flat on top. That height gives each cupcake a clear gingerbread outline instead of leaving the biscuit half-hidden in icing. Leave space between the rows on a white pedestal stand so you can see the smiling faces all the way to the back.
Height Across the Table
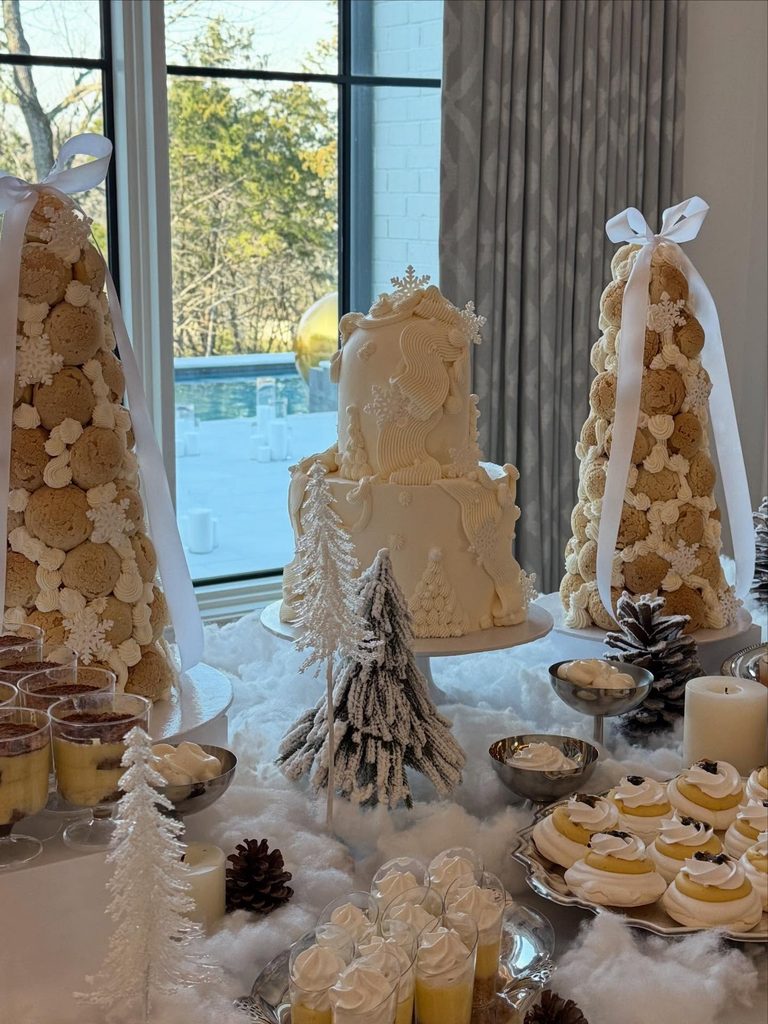
A dessert table with everything at one level looks flat, and the fix is to build upward in three places. Here the two croquembouche towers flank a tiered cake, and the small items sit low in front. The common mistake is making all three tall pieces the same height. Let the center cake sit a little lower than the towers so the eye moves across the table in a curve.
Leave the front row of cups and trays low, or they will block the cake.
Ivory Dessert Display
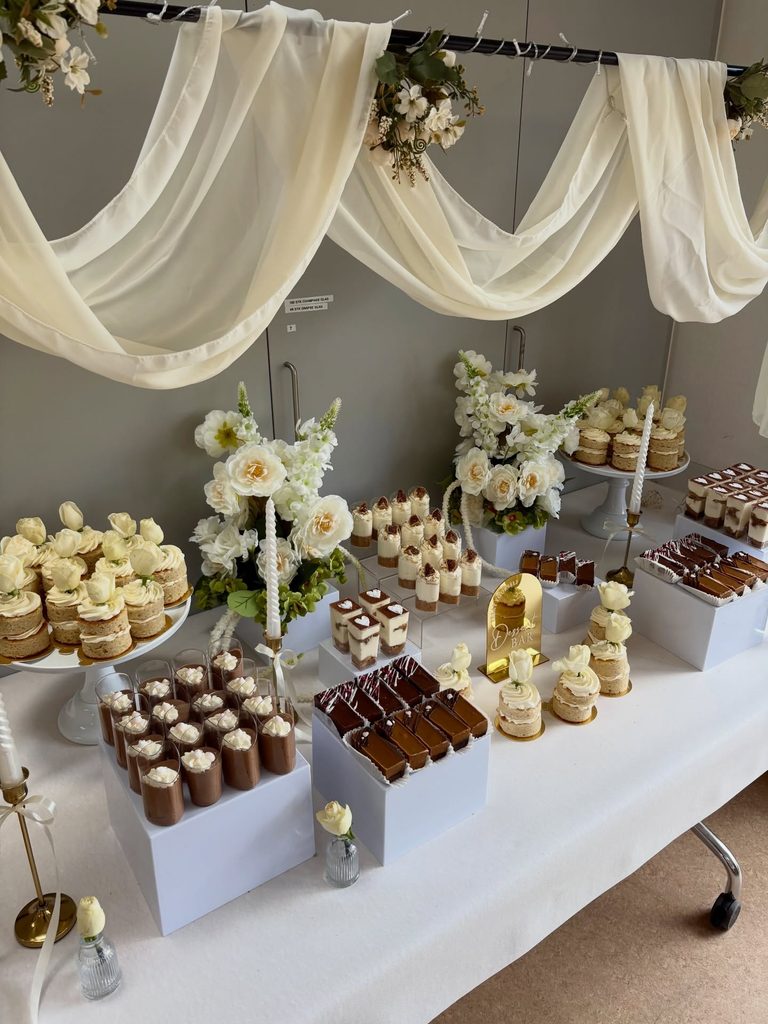
Layer ivory fabric above the table and carry the same pale tone through the flowers and frosting. Against a gray wall, the display stays light without relying on red or green; varied cake shapes and chocolate trays keep the spread from blending together. A few raised stands and white blocks give the small desserts different heights.
White Dessert Plinths
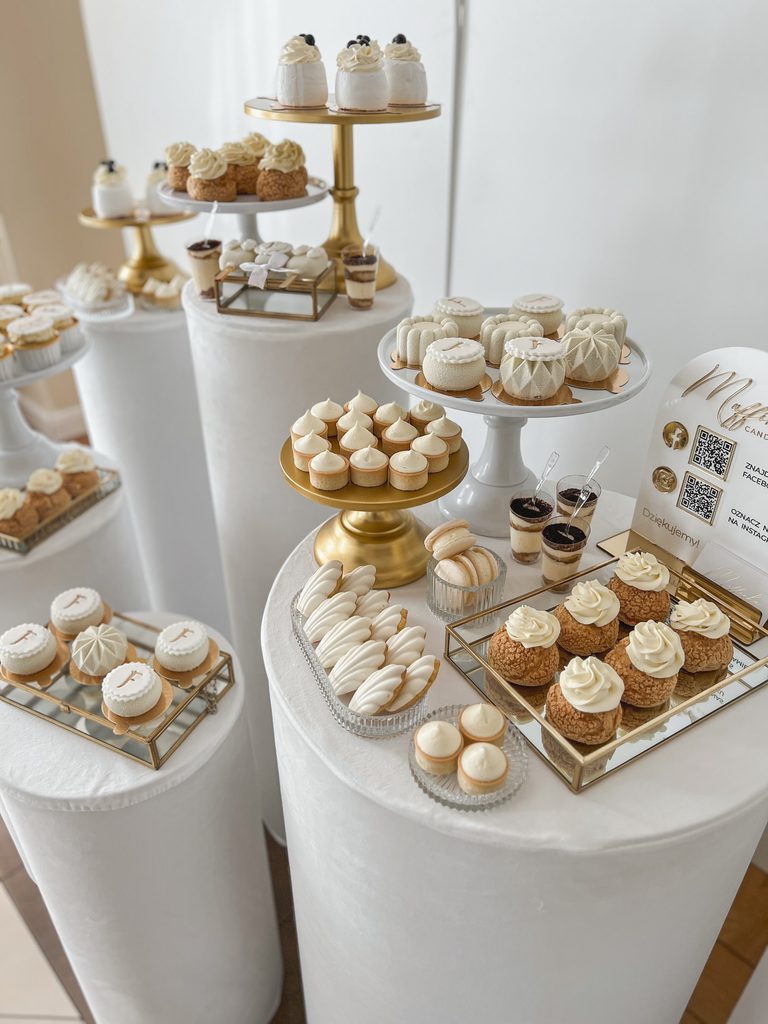
Group white dessert plinths at different heights along a dining room wall, away from the main meal. For a Christmas drinks party, put the tallest ones at the back and lower ones in front so guests can reach the cakes. Gold cake stands add height without taking up much room on each plinth.
Snowflake Shortbread Platter
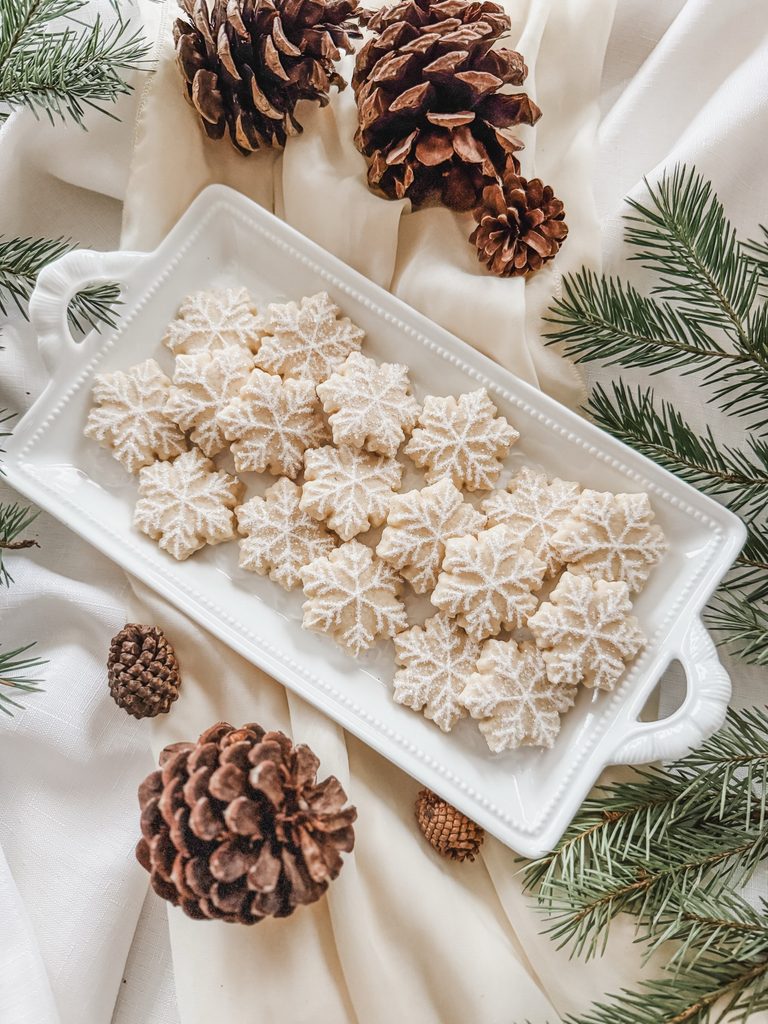
A single tray of snowflake-shaped cookies in one pale color is the right idea for someone who wants a dessert table with a clear center and doesn’t want to bake six different things. The cookies here are all the same size, dusted with a fine sugar, and laid in loose rows on a white rectangular tray with handles. That gives you one dish that looks finished the moment it’s set down.
It’s a good fit if you’re hosting a smaller group, or if your table already has a loud cake or a bright trifle and needs something quiet next to it. It also works for anyone with a cookie cutter and an afternoon, since the shape does the decorating and there’s no icing to pipe.
If you’re feeding a crowd of twenty or more, pick a different idea from the list. One tray empties fast, and a refill never looks as good as the first layout. Anyone who wants strong color on the table should go elsewhere too, because this one stays in cream and white.
Macaron Christmas Tree
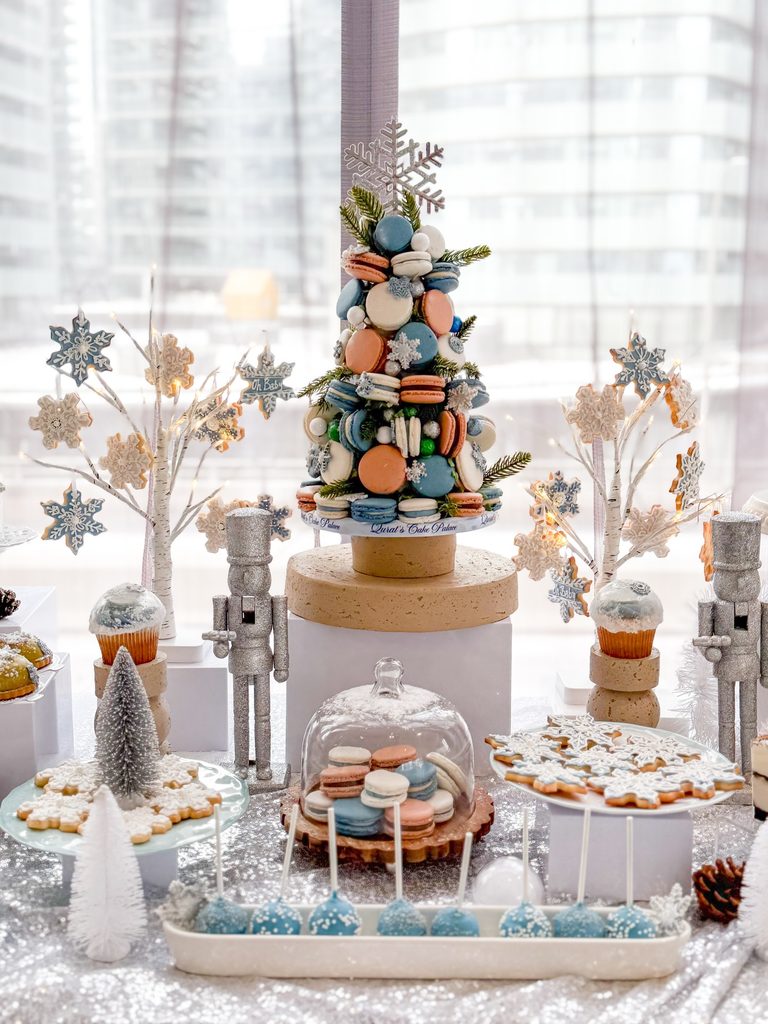
Stack macarons into a cone on a raised cake stand, using small dabs of icing to hold the layers in place. A palette of pale blue, cream, and muted orange gives the tree a frosted look without relying on the usual red and green. Add a few sprigs of evergreen between the shells, then set snowflake cookies around the base.
Keep the macarons close in size so the cone stays balanced and easy to serve.
Layered Dessert Cups
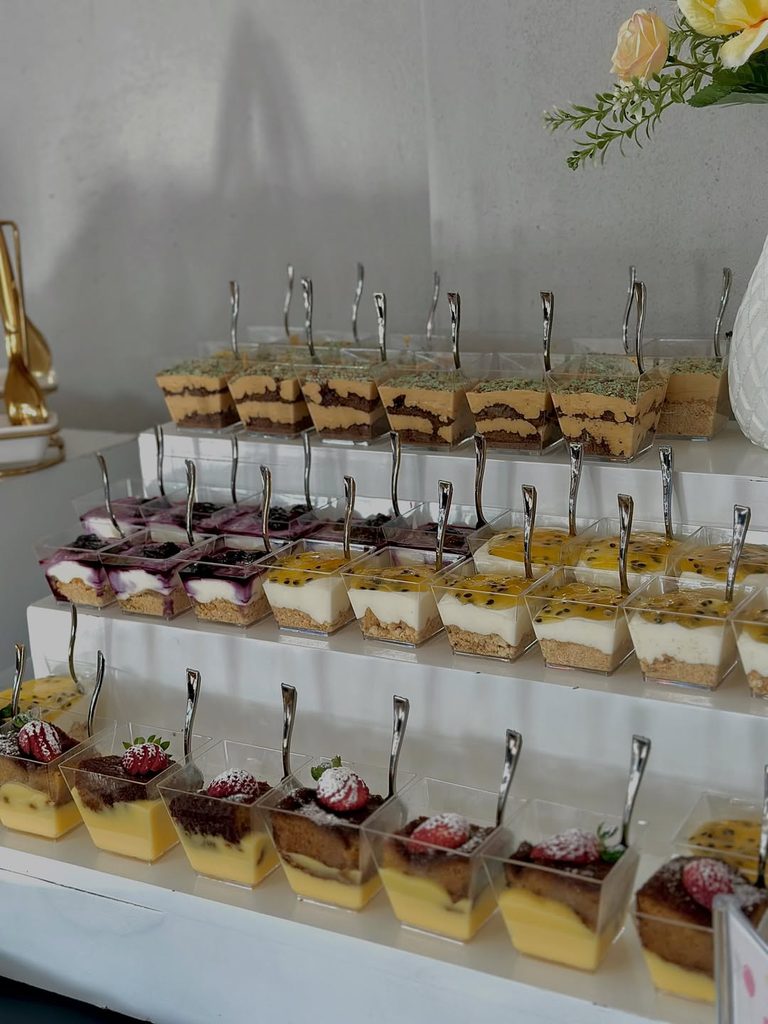
Layer cake crumbs, custard or cream, and fruit sauce in clear cups so each serving shows its stripes. Use crushed biscuits instead of cake, then finish with berries and icing sugar. Arrange the cups on stepped risers with a spoon in each; upturned boxes under a cloth can stand in for display stands.
Dessert Table With Varied Heights
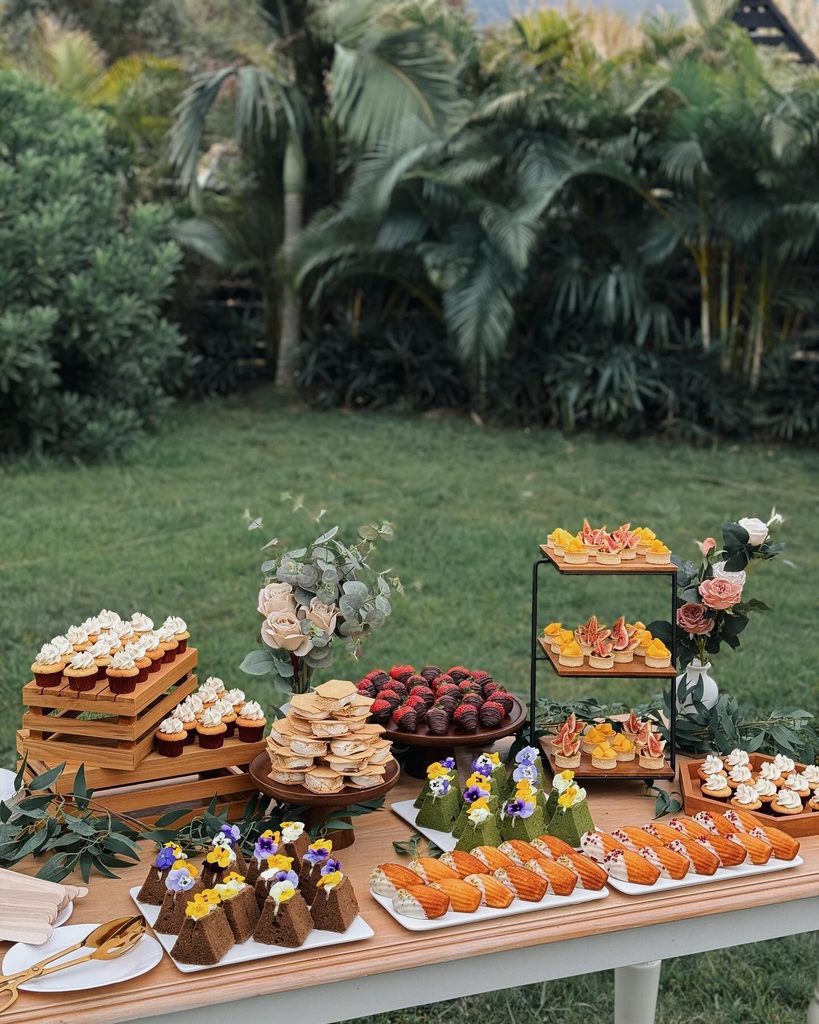
Put the desserts at different heights, and keep each kind together in one tight group. The usual mistake is laying everything flat on the table, so the back rows vanish and you get one sheet of small brown shapes. Stacked wooden crates, a three-tier stand and a couple of low cake stands give the eye several levels to travel across.
The second mistake is too many kinds with too few of each. A single piece of eight different desserts looks like leftovers, while a full tray of madeleines or a dozen cupcakes in rows looks planned. I’d stop at five or six kinds.
Flowers need the same care. A tall arrangement at the front hides the food behind it, so I’d put narrow vases at the back or the corners.
Tiered Mini Dessert Table
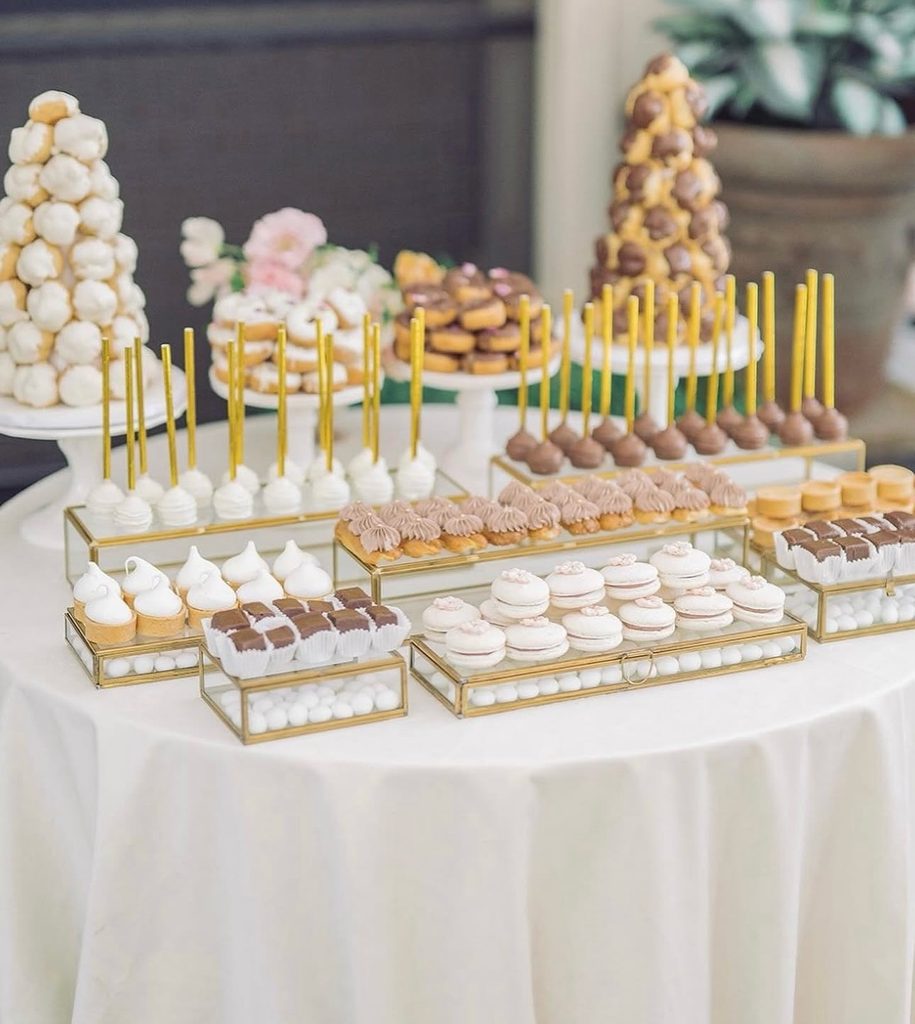
Build the display from the back forward, using cake stands for the tall pieces and low, gold-framed risers for small bites. Set the tallest cookie or meringue towers at the rear, then place shorter stacks of pastries in the middle so they do not block the front row. Fill the lowest trays with macarons, brownie squares, and other small desserts, grouped by type rather than scattered across the table.
The key step is setting the heights before the food goes out. Check the arrangement from the guest side, and move each stand until every tier can be reached without stretching over another dessert. Leave a hand-width between trays for serving tongs and for guests to lift a plate. Add the most delicate items last, then refill each group from the back as the party goes on. A white cloth under the gold frames connects the different levels without adding more decoration.
Gingerbread House Dessert Board
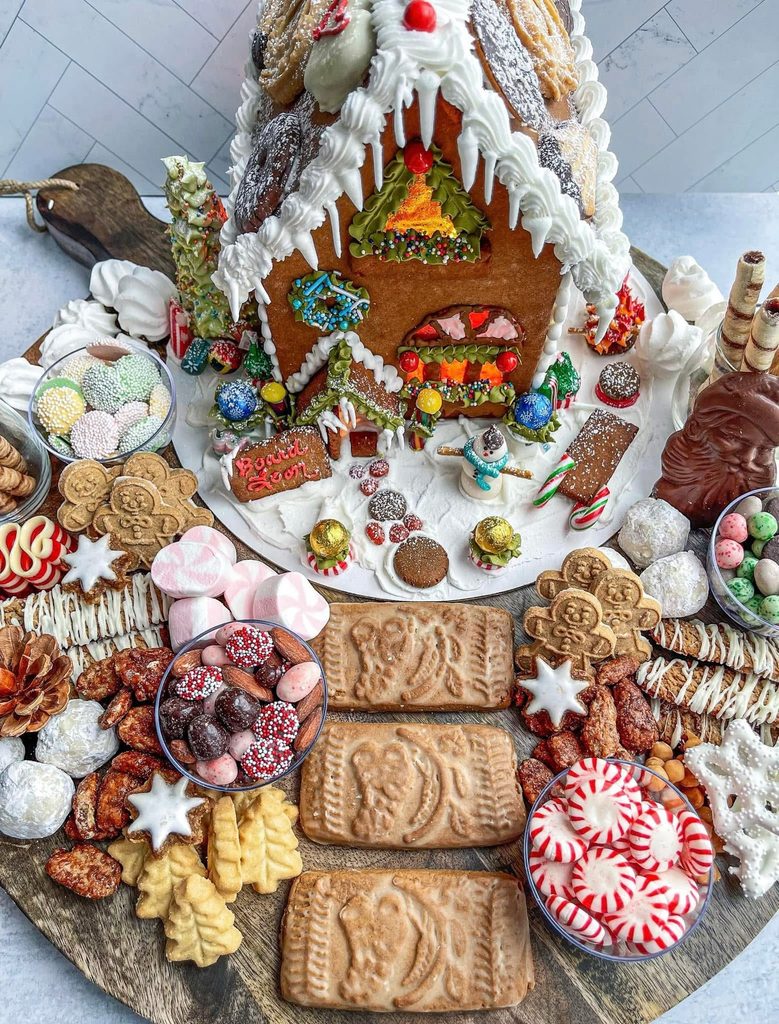
Set a gingerbread house toward the back of a large serving board, then arrange the smaller sweets around its base. The height matters more than adding another kind of candy. It gives the spread a clear center, so the cookies and chocolates feel like part of one display rather than a pile of separate treats. Without it, even a full board can look flat, especially when most of the food is roughly the same size.
Leave enough board in front of the house for guests to take something without reaching over the roof. Fill that area with treats that can be picked up individually, and put loose candy in small bowls tucked among them. The bowls give those tiny pieces a boundary instead of letting them scatter between larger cookies. I’d also leave the doorway visible rather than bank sweets against every wall. That bit of space lets you see the house from base to roof, which is the reason to build the board around it.
Hot Cocoa Bar Dessert Table
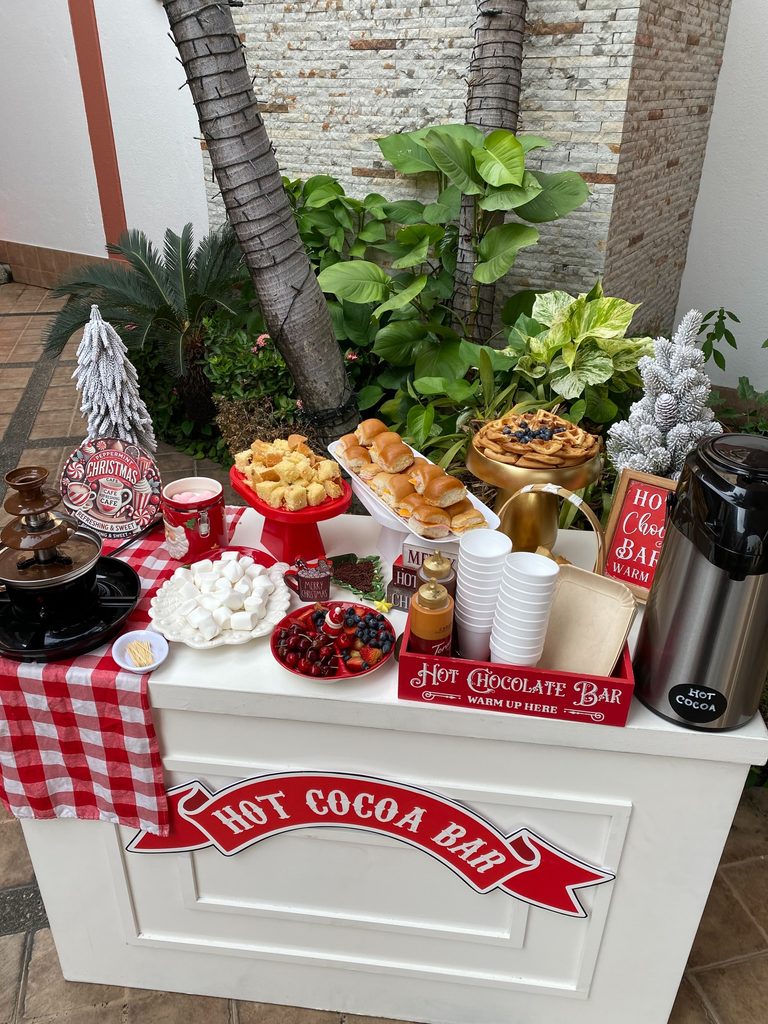
A hot cocoa bar works as a dessert table when the cocoa sits in a steel airpot at one end and the sweets take up the rest of the top. Set one up on a white cart with a red gingham runner, and a small chocolate fountain on the other end for dipping.
Most of the food is easy to buy or bake. There are marshmallows on a white platter, pound cake cubes on a red cake stand, and sweet rolls on a long tray. A waffle stack with blueberries sits on a gold pedestal, and a plate of cherries, strawberries and blueberries covers the fruit. Syrup bottles stand next to the cups.
If you have no fountain, melt chocolate in a slow cooker on low and set out skewers. A thermos or a large coffee urn will hold the cocoa in place of the airpot. Paper cups stacked in a crate work well, and a cardboard sign can stand in for the painted one.
Christmas Treat Boxes
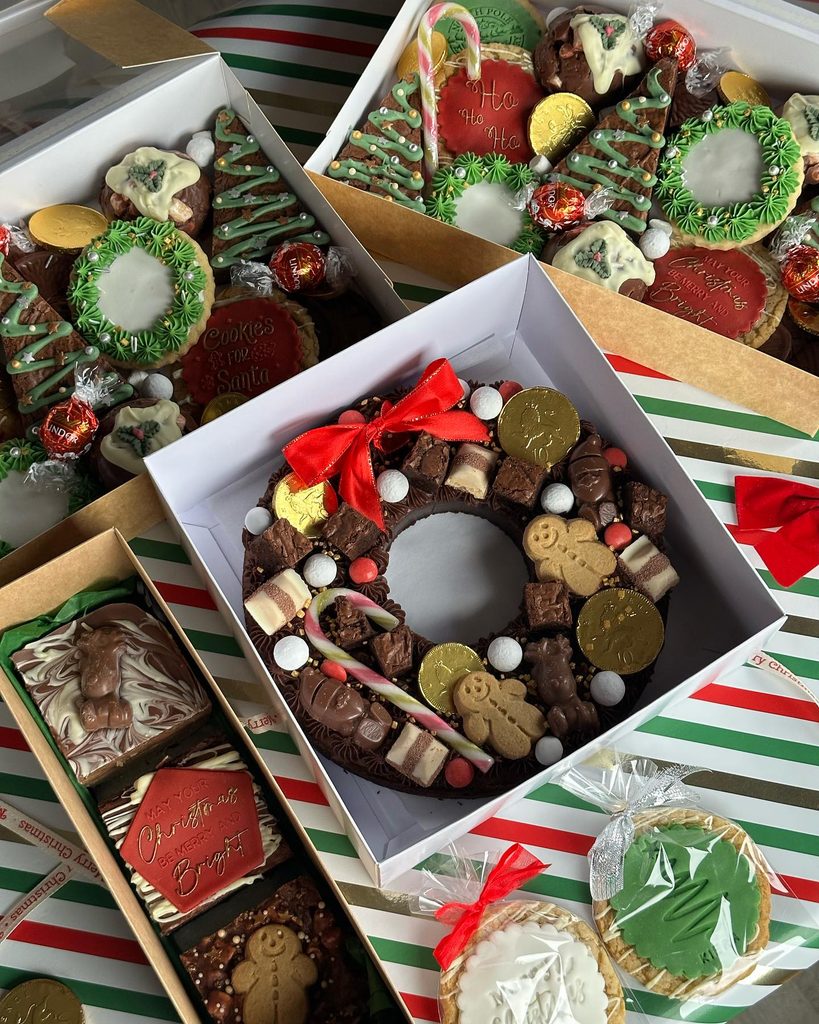
A boxed assortment of Christmas cookies and chocolates gives guests several sweets without needing a serving station. Decorated tree cookies, iced wreaths, and a chocolate-covered ring add variety, while open boxes can sit across a side table. This works for hosts who want gifts and dessert in one setup, or guests with different tastes.
Choose another idea if you need one large centerpiece or want everything plated before guests arrive.
Bite-Size Santa Cream Puffs
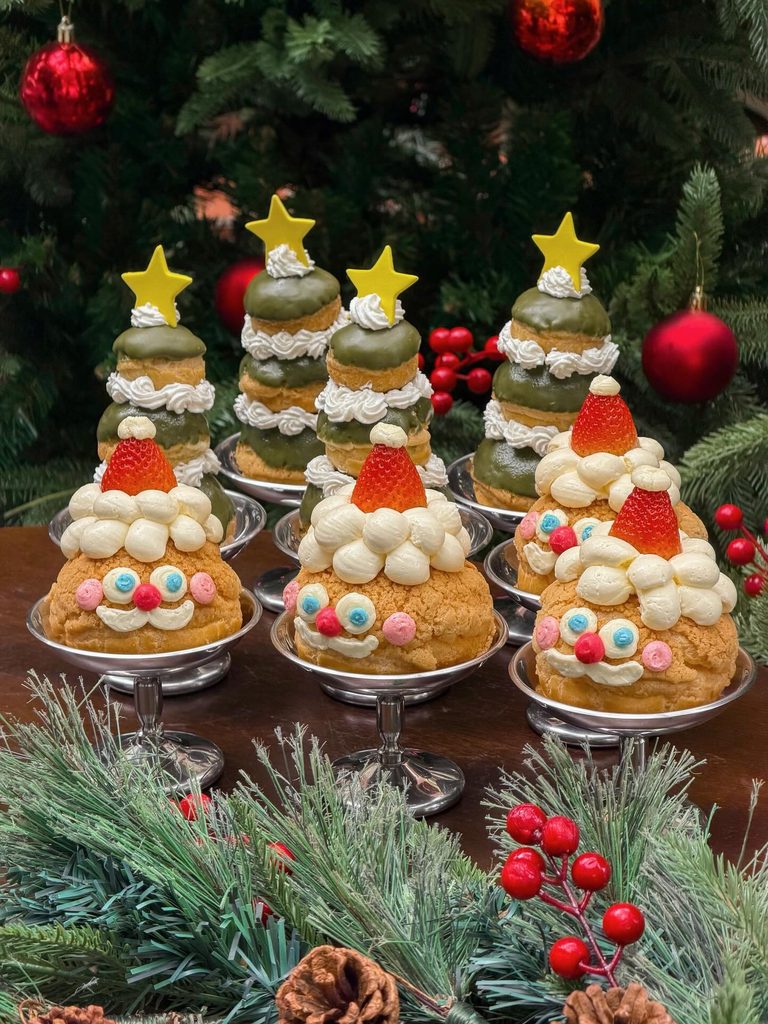
Bake bite-size Santa cream puffs rather than large ones, with a strawberry tip for each hat. The smaller size needs less cream around the face, so use a few dots for the beard instead of thick dollops. Group them on a silver serving dish.
Tree-Shaped Individual Tarts
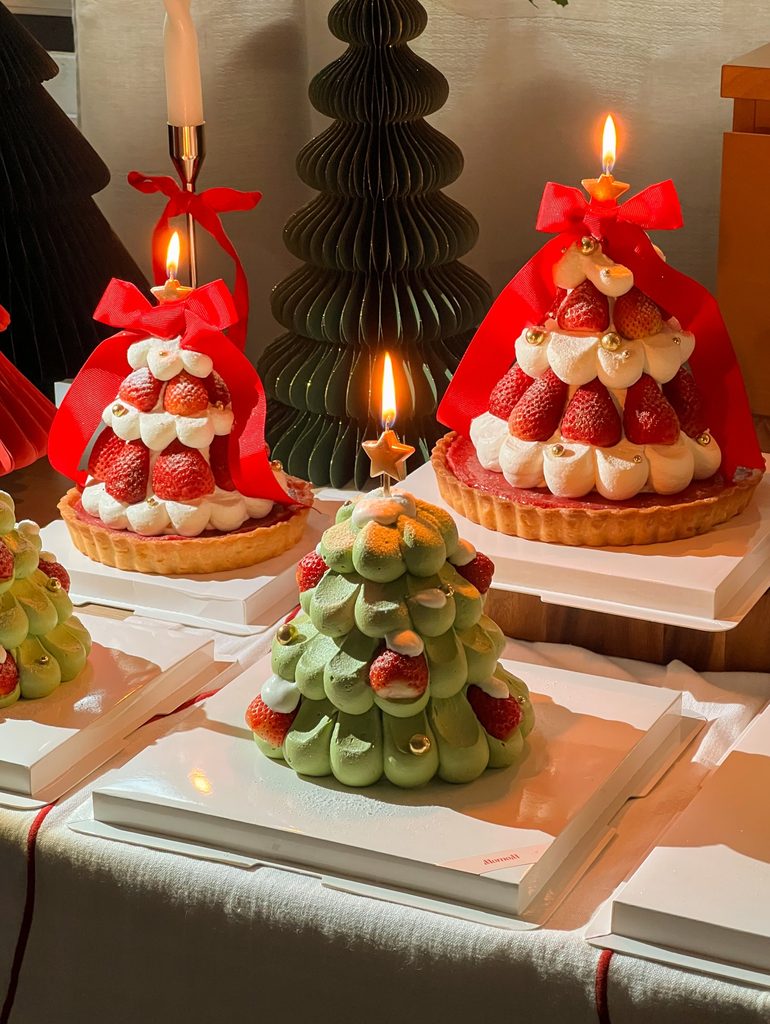
Individual tarts built into tree shapes give each guest a whole dessert and give the table some height. The usual problem is lean. Strawberries stacked in tiers slide if the cream underneath is too soft, so pipe the cream firm and set each tier on a dab of it before adding fruit. A tart shell with a thick, sturdy rim, like the ones here, holds the weight better than a thin one.
Candles are the second thing that goes wrong. A lit flame set close to ribbon is a real hazard, and the red bows here sit only a few inches from the stars. I’d tie the ribbon lower, around the base of the tree, and keep the flame clear of it.
Leave space between the white boxes too. If they touch, nobody can lift one without knocking the next.
Christmas Tree Cupcake Cluster
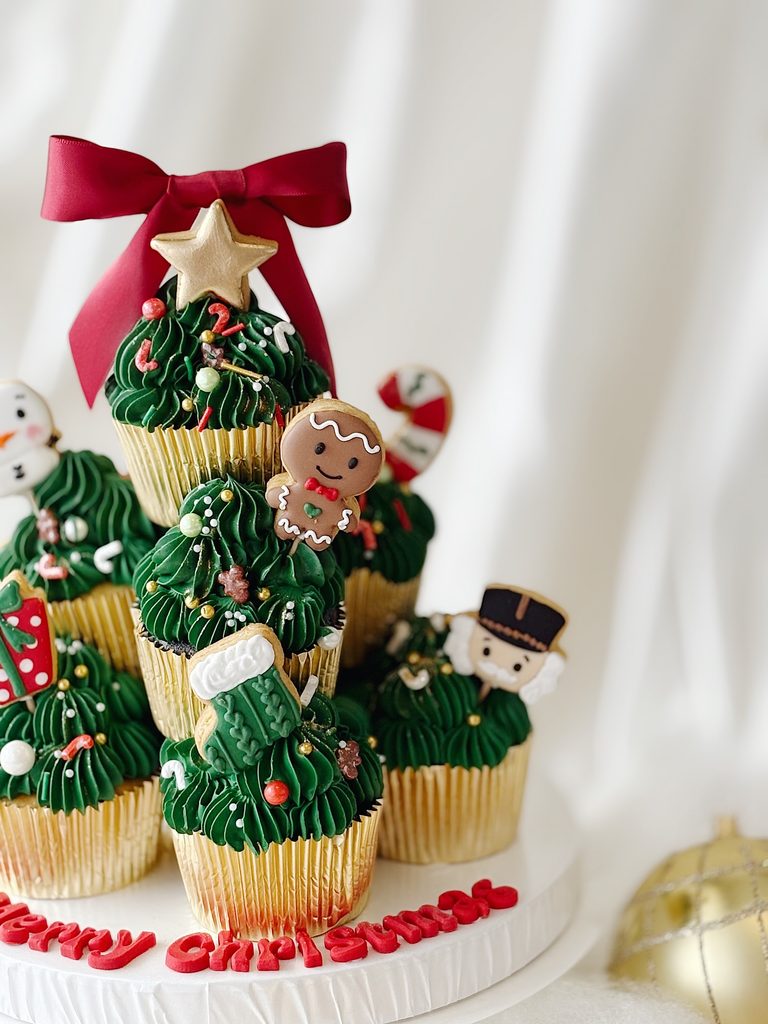
Leave room around the base before you start arranging the cupcakes; the tree shape needs a wide bottom and a narrow top. Set them on a sturdy platter or tiered stand, then place the cupcakes in a cone-shaped outline. Pipe green frosting onto each one before arranging them, so you can reach the sides without brushing the decorations against each other. Add small candy ornaments and a star topper once the cluster is in place.
The most important step is building a stable shape: use a flat, secure surface and avoid balancing cupcakes directly on piped frosting. A gingerbread figure or two can sit near the front, where guests can see them without hiding the green frosting. Finish with a red ribbon behind the top cupcake, keeping it clear of the icing.
Coastal Christmas Dessert Cups
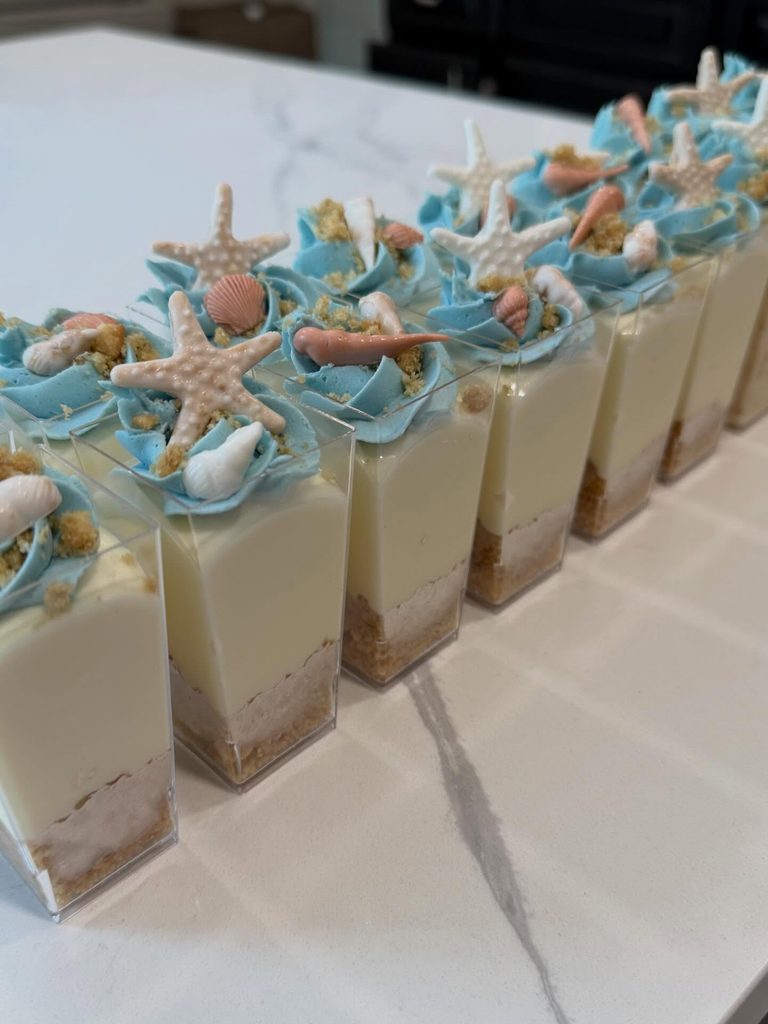
Set coastal Christmas dessert cups along the front of a sideboard, where guests can take one without reaching across a cake or platter. Blue frosting and starfish decorations give you a direction for a seaside holiday table, especially if your Christmas decorations already lean blue.
Leave a little space between the cups so the toppings stay intact when someone picks one up. Put small spoons in a glass at the end of the row, beside the napkins. For a larger gathering, bring out a second batch after dinner rather than crowding every cup onto the table.
Themed Dessert Cups With Toppers
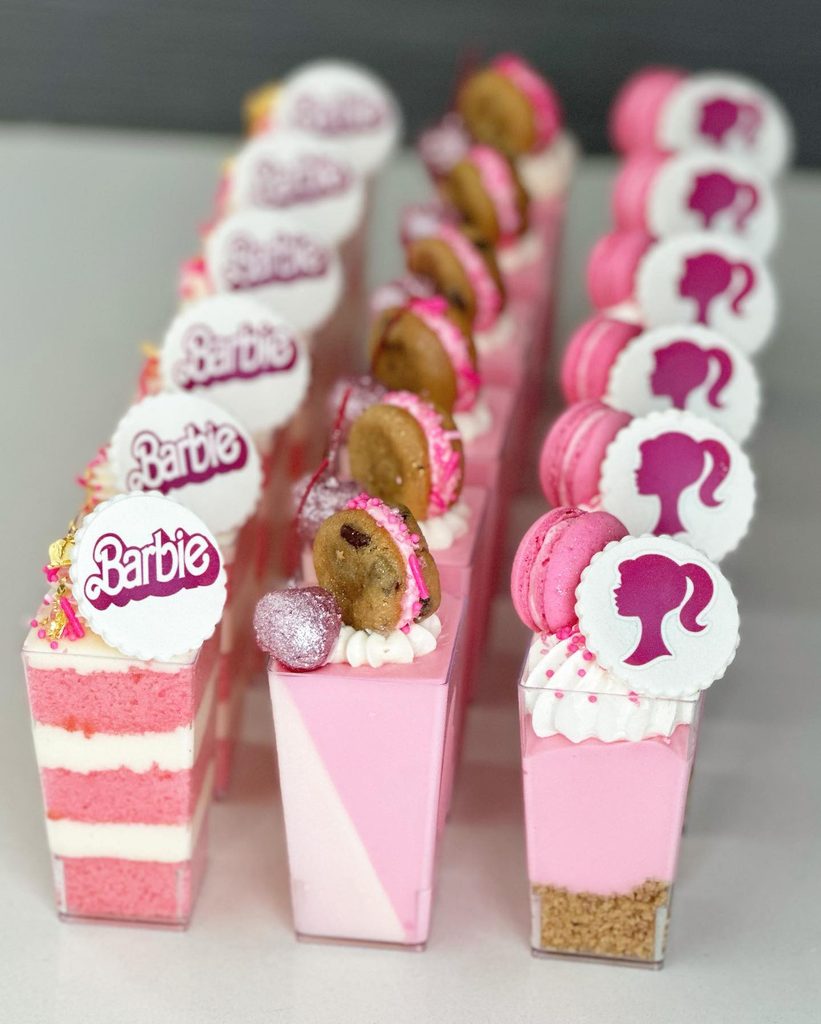
Individual dessert cups in a single color, each with the same round printed disc on top, make a table look planned from across the room. The discs do most of the work. Each is a scalloped white circle set at the same angle, leaning against a macaron or a mini cookie. The cups underneath hold different things: striped pink cake, two-tone mousse, a graham crumb base. The discs keep them looking like one set.
Without them, you’d have a tray of pink cups with assorted toppings, which is nice to look at but easy to walk past. With them, every cup faces the same way and the rows turn into a pattern.
I’d set the cups close together so the discs stack up in lines. For Christmas I’d print a tree or a snowflake on the discs and keep the pink, or go all red.
